You can add new fields in the Pre-Chat window to collect the information you need from visitors.
Step by Step Instructions
- Log in to Comm100 Control Panel.
- In the left navigation bar, click the Live Chat tab.
- Click the Campaign drop-down menu, go to Pre-chat and turn on the Pre-chat toggle key.Note: If you have multiple campaigns, please choose the campaign you are using from the campaign drop-down list.
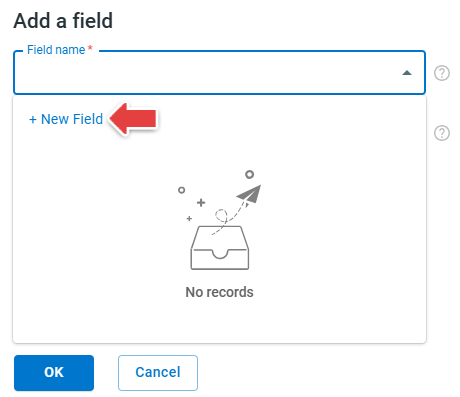
- Scroll down the page to the Fields section and click Add a field.
- In the Add a field drawer, click Field name and New Field.
- Enter the field name, select the appropriate Type, provide any other required information, and click Save.
- Configure the Visible or Required property as needed, then click OK.
Visible means that the field will be shown in the pre-chat window. Required means the visitors need to fill in this field. - Click Save to save the changes.


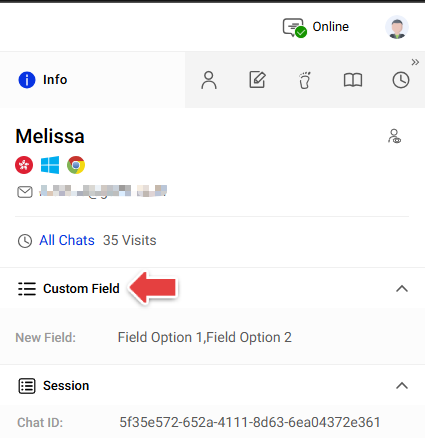
After that, the new field will appear in the pre-chat window. Visitors must complete any required fields before starting a chat. The information they provide in the pre-chat window will then be displayed in the Custom Field section under the Info tab of the Agent Console.