Comm100 Live Chat supports Auto Translation with built-in Google Translate integration. Auto Translation enables your agents to chat with visitors who speak a different language.
- This feature is available in Live Chat Ultra and Omnichannel Ultra plans. To learn more about Comm100 product plans, visit here.
- Auto Translation for Ticketing & Messaging and Auto Translation for Chatbot are also supported. To learn the details, see Auto Translation for Ticketing & Messaging, Auto Translation for Chatbot.
Enable Auto Translation for Live Chat
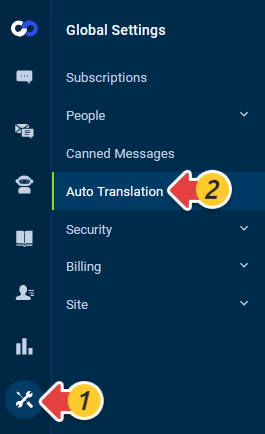
- Log in to your Comm100 Control Panel.
- Navigate to Global Settings > Auto Translation.
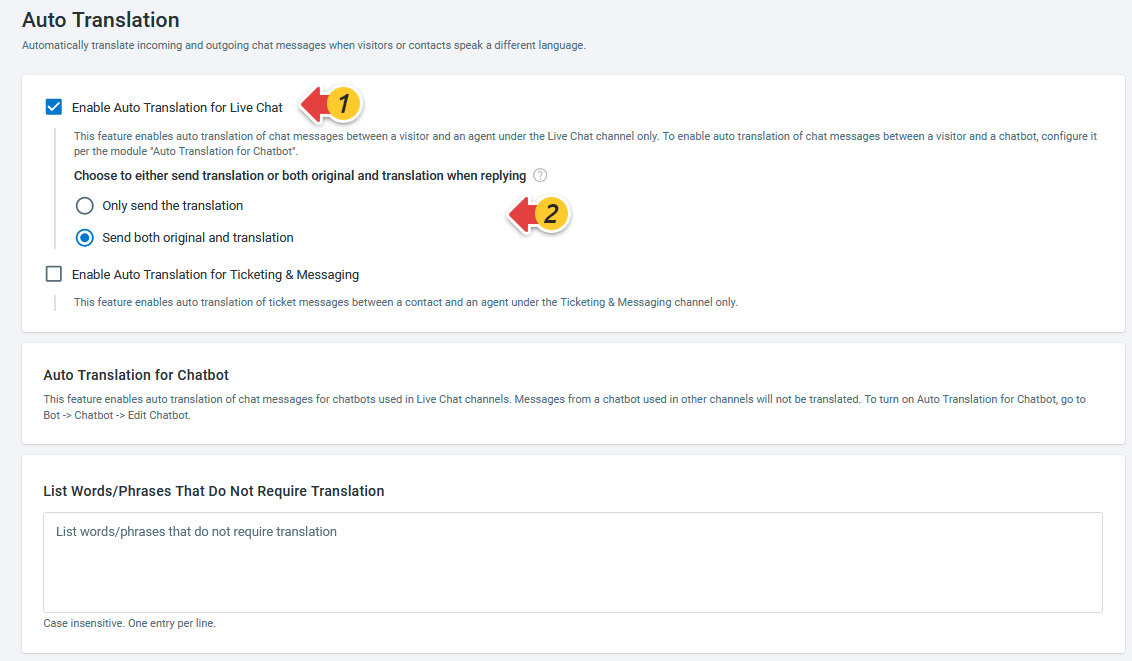
- Turn on the Auto Translation for Live Chat toggle key, and choose whether to send the original text when replying.
- (Optional) In the List Words/Phrases That Do Not Require Translation area, add the words and phrases so that they will be kept in both incoming and outcoming messages. Note: The no-translation list configuration is global. If Auto Translation for Ticketing & Messaging or Auto Translation for Chatbot is enabled, the list also applies to these features.
- Click Save.
Choose Preferred Language for Auto Translation
After Auto Translation for Live Chat is enabled, your agents can set their preferred language on the Agent Console, and use it in the chat.
To set preferred language for auto-translation, follow these steps:
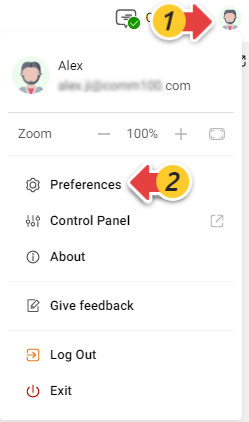
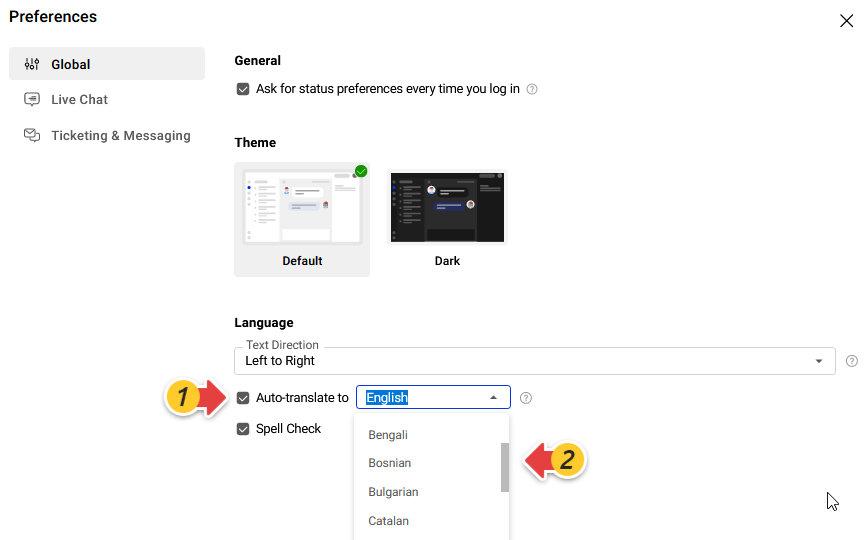
- After logging in to the Agent Console, click your avatar in the top right corner, then choose Preferences to open the Preferences popup.
- In the Global tab, select the Auto Translate to checkbox and choose a language from the dropdown list.
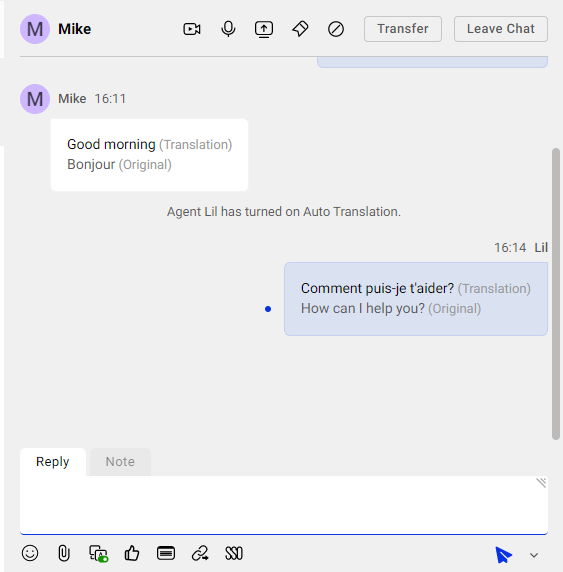
You can use Auto-translation during a chat when your preferred language is set up.
During a chat, the chat system auto-detects it when a visitor is speaking a different language. You just need to click a button to turn on the translation.
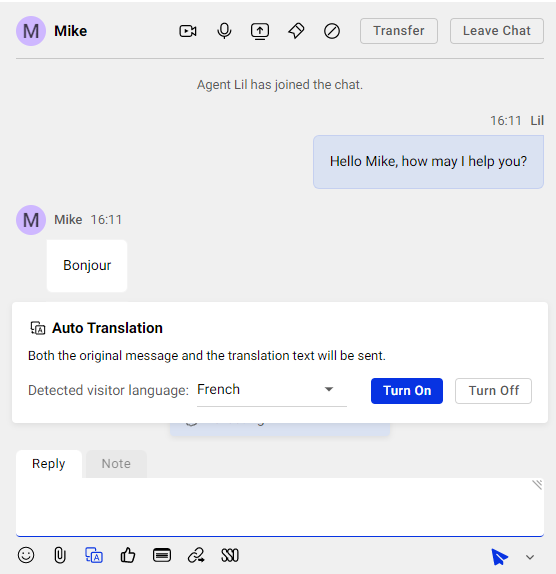
After Auto Translation is turned on, the chat messages from and to the visitor will be automatically translated. The conversation can keep going when your agent and the visitor type in their own language.