Screen Sharing allows your agents and visitors to share their screens in real-time during a chat. It enables participants to showcase various screen content, including documents, presentations, websites, applications, or their entire screens. By facilitating visual communication, Screen Sharing streamlines the process of guiding visitors through complex tasks, eliminating the need for intricate explanations and expediting the resolution of issues.
To use Screen Sharing, you simply need to turn it on in your account. No additional installations or downloads are required on either the agent or visitor side.
- The Co-browsing feature retired on Dec 14, 2023. To use the co-browsing functionalities, please switch to Screen Sharing.
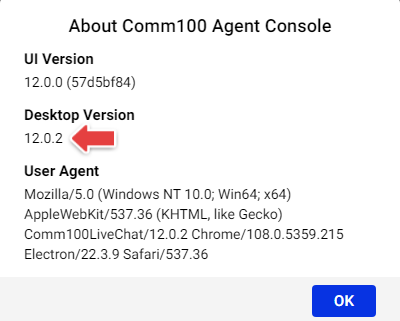
- If you are using Desktop Agent Console, please ensure you have upgraded to version 12.0.2 or above to access the full functionality of the Screen Sharing feature. The automatic upgrade typically takes effect after you exit Desktop Agent Console and log in again.
- Screen Sharing is available in both Live Chat Ultra and Omnichannel Ultra plans. Click here to compare the features across different packages.
This article covers the following sections:
- Enable Screen Sharing
- Screen Sharing Request from Agent Side
- Screen Sharing Request from Visitor Side
- Visitors on Mobile Devices
To enable Co-browsing, follow these steps:
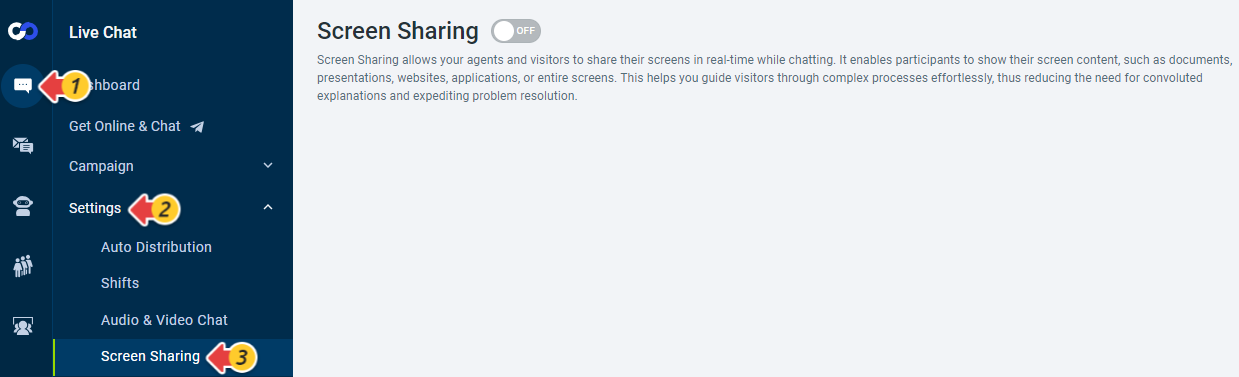
- Log in to the Comm100 Control Panel.
- From the left navigation menu, go to Live Chat > Settings > Screen Sharing.
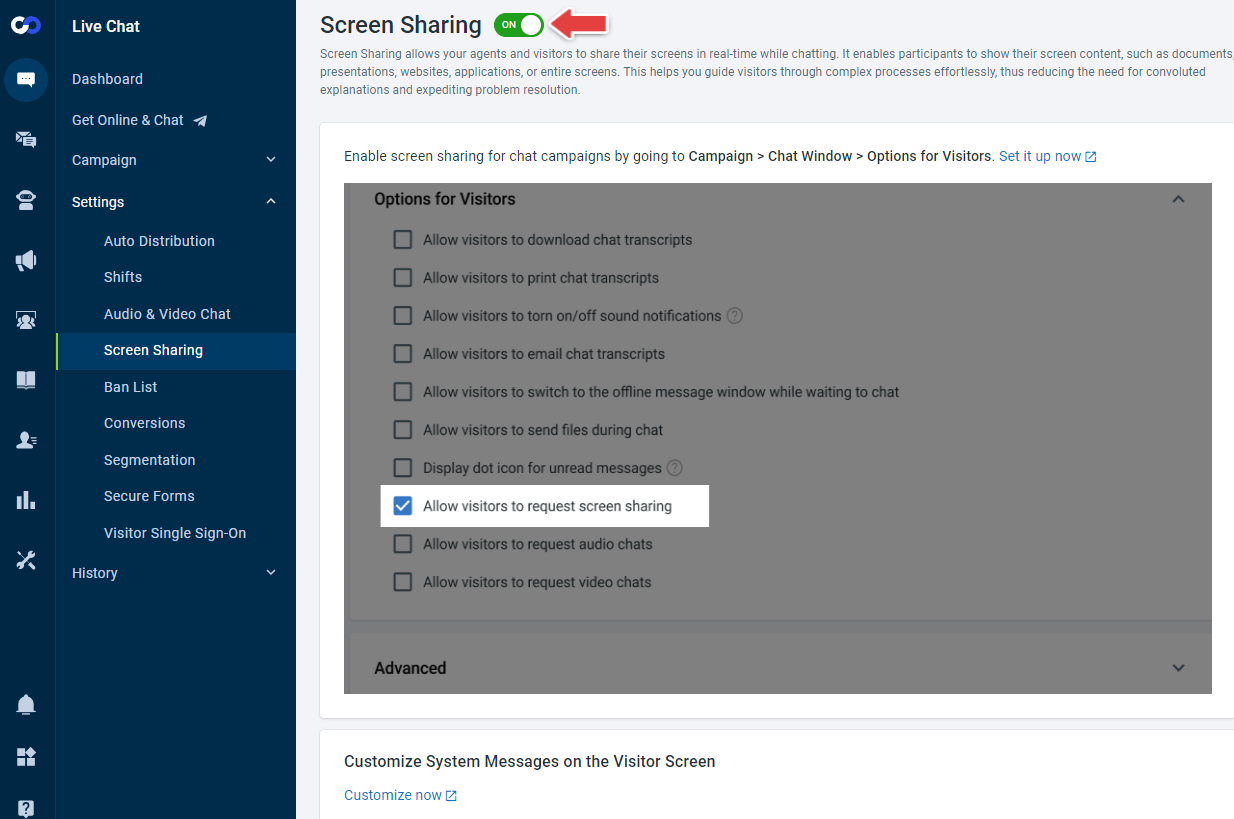
- Turn on the Screen Sharing toggle key.Note:
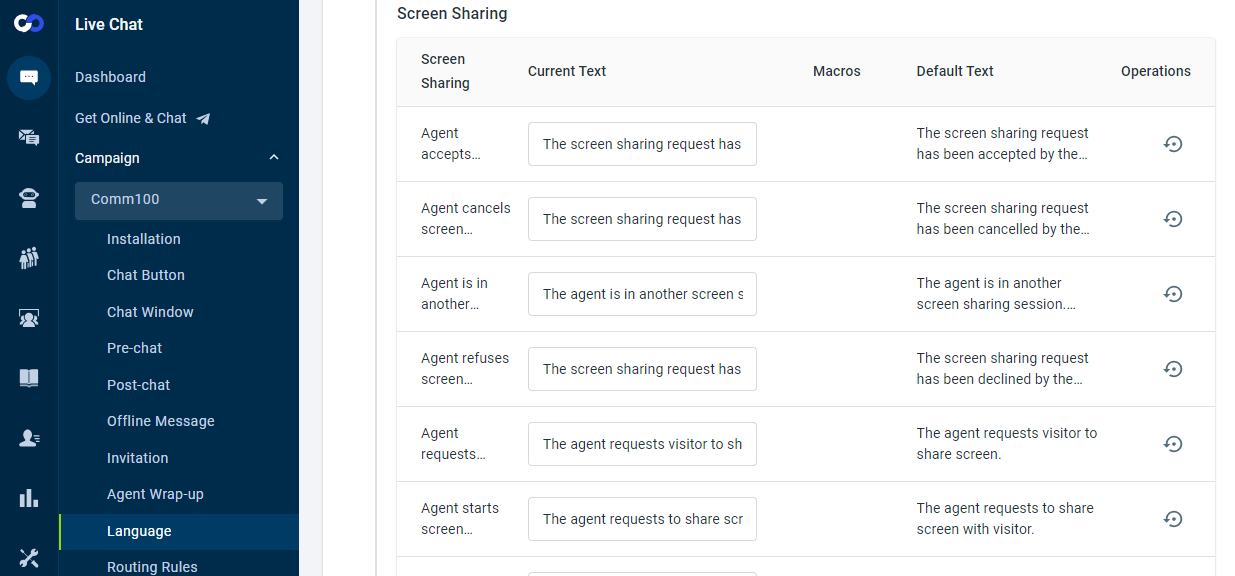
- If you want to customize system messages on the visitor’s screen, click the Customize now link. The Language settings from the Campaign menu appears. You can choose Customize language for the visitor side interface and locate the Screen Sharing section to adjust the Current Text as needed.
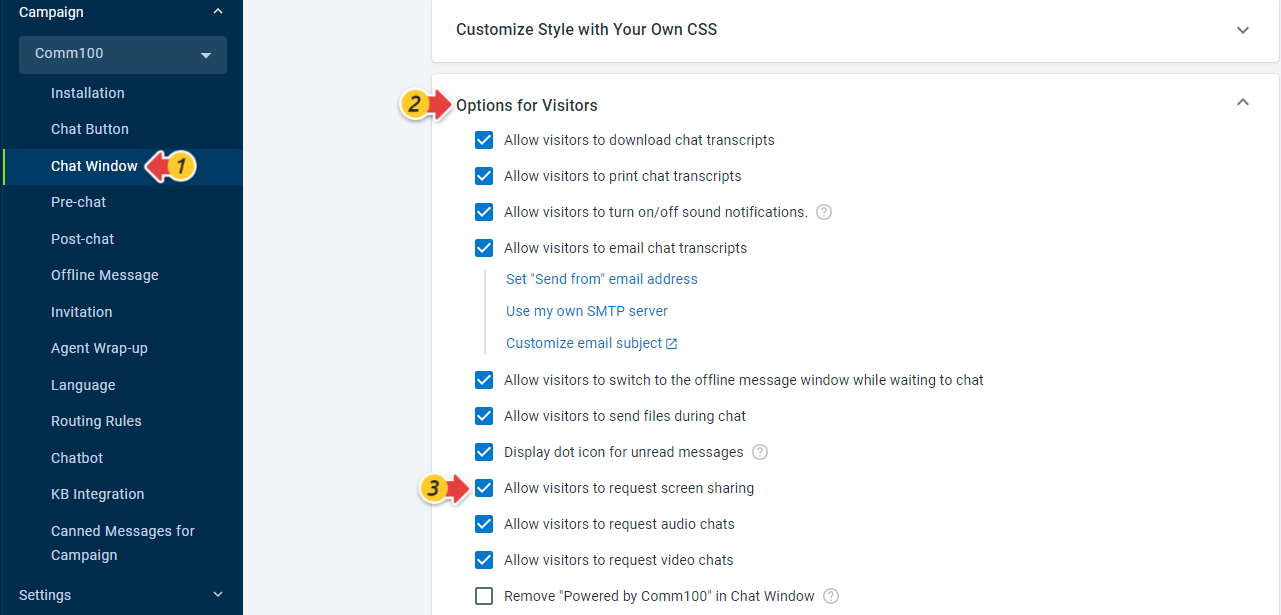
- To give visitors the option to request screen sharing with your agents, you can click Chat Window, expand the Options for Visitors and check Allow visitors to request screen sharing.
- If you want to customize system messages on the visitor’s screen, click the Customize now link. The Language settings from the Campaign menu appears. You can choose Customize language for the visitor side interface and locate the Screen Sharing section to adjust the Current Text as needed.
Screen Sharing Request from Agent Side
To start a screen sharing session from the agent side, follow these steps:
- Log in to your Agent Console.
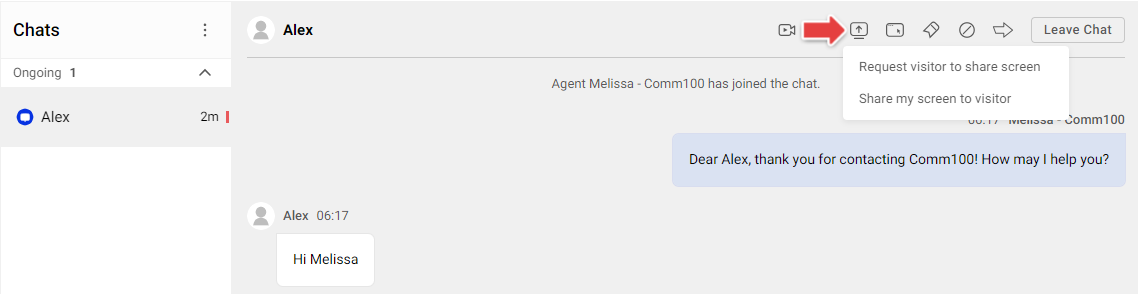
- Click the Screen Sharing button at the top right corner of the conversation area.
- There are two options: Request visitor to share screen and Share my screen to visitor.
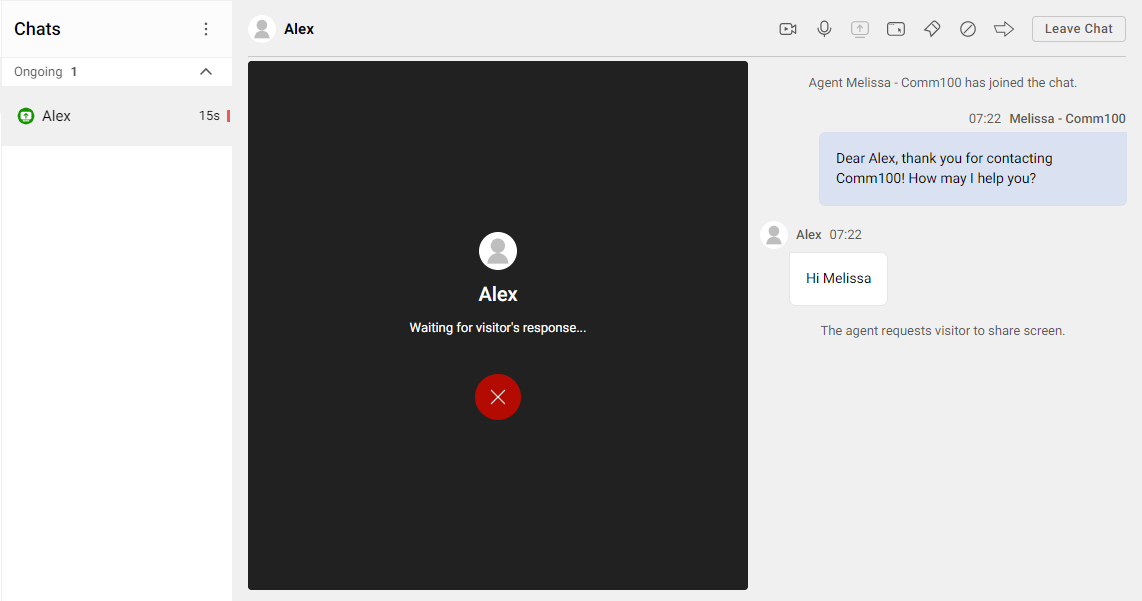
- Request visitor to share screen
A side window appears on your side, waiting for your visitor to accept the request.
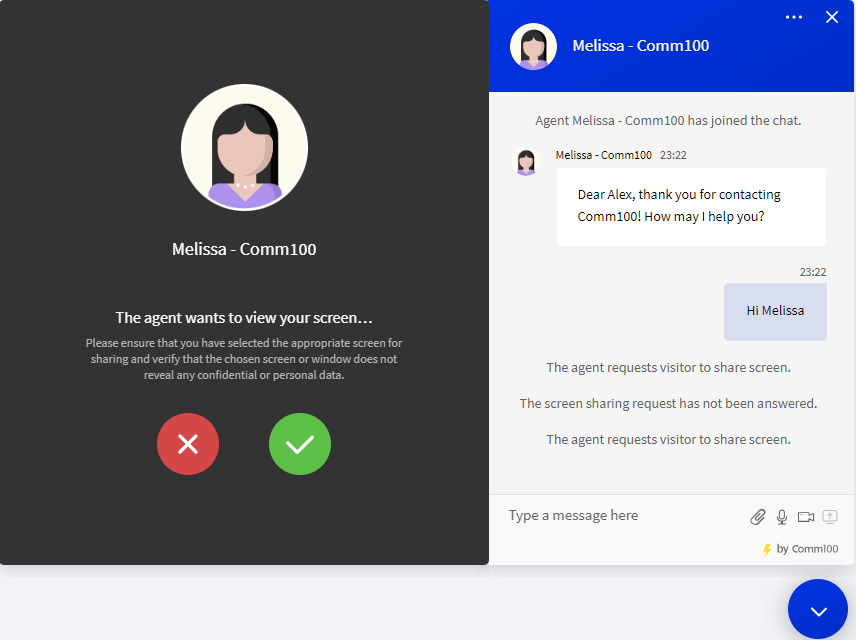
Simultaneously, on the visitor side, a side window opens for the screen sharing request. The visitor can either accept or decline the request.
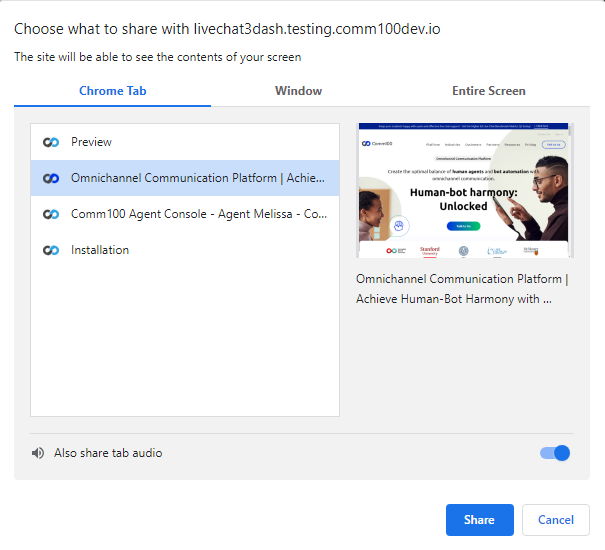
After the visitor accepts the request, they can select to show a browser tab, an application or their entire screen. Besides, they can also choose to share their system audio to better present some key information.
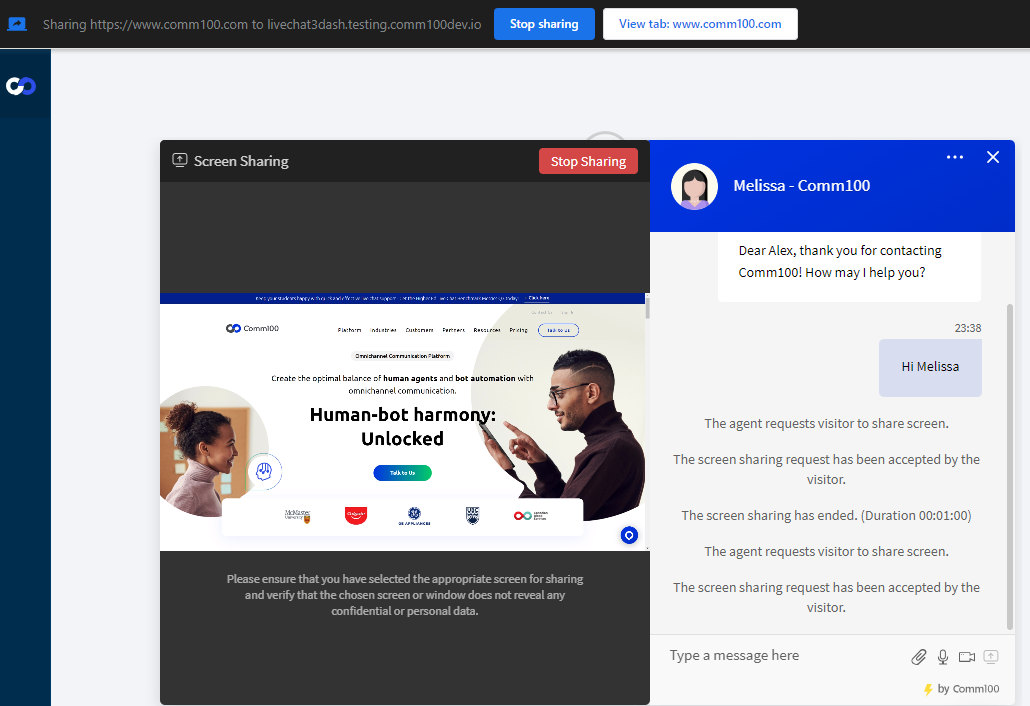
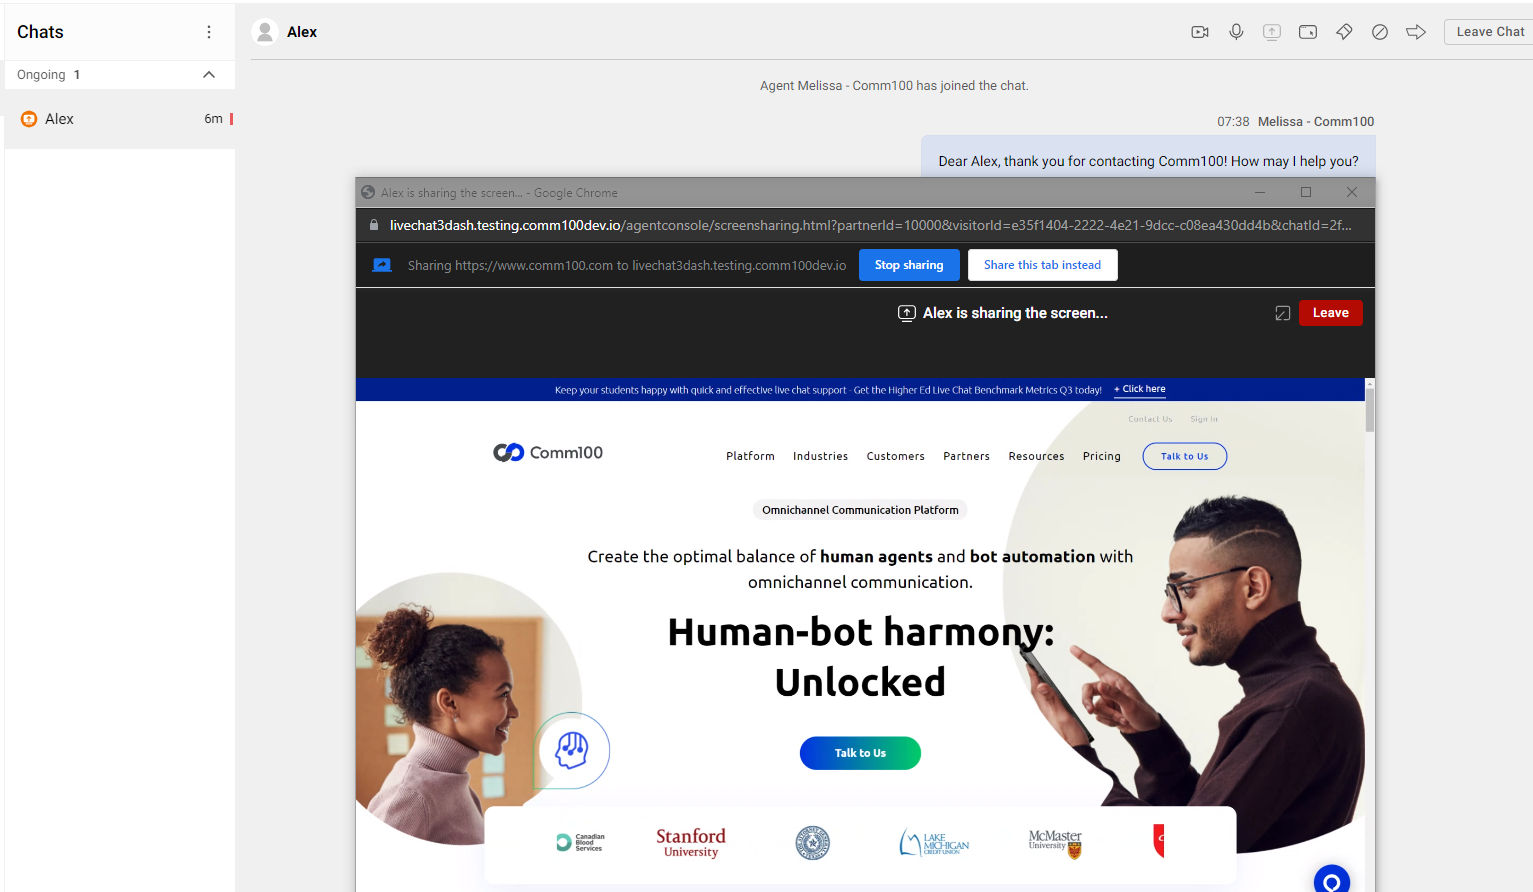
Once the screen sharing session is established, the content being shared within the browser tab will be outlined in a blue or red frame.
Throughout the session, visitors can opt to stop the sharing either through the Stop Sharing button on the side window or from the embedded Stop sharing button in the browser. Both access functions identically.
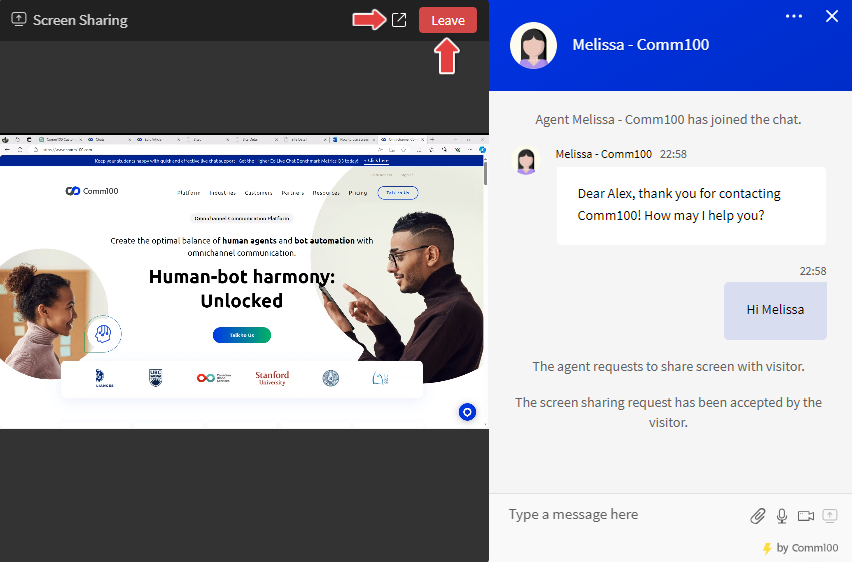
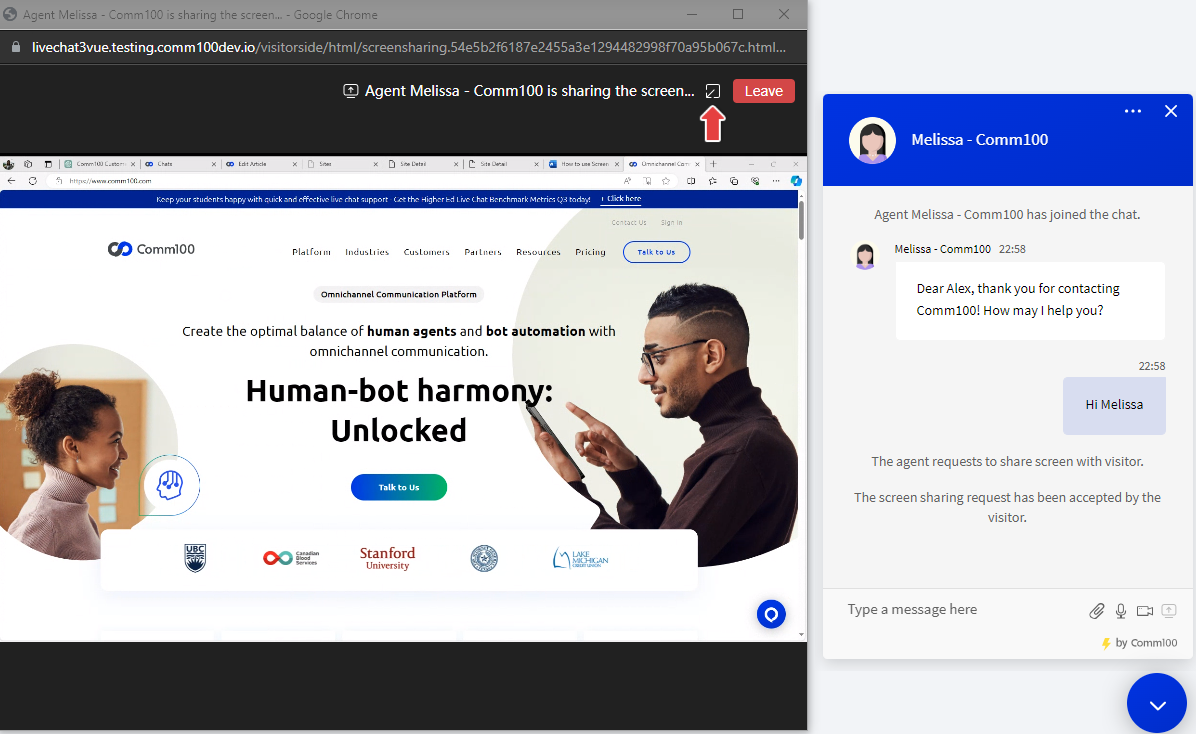
While on the agent side, you can choose to Leave or pop up the shared screen in a standalone window for improved visibility.
The popped-out window can also be popped back into the Agent Console.
- Share my screen to visitor
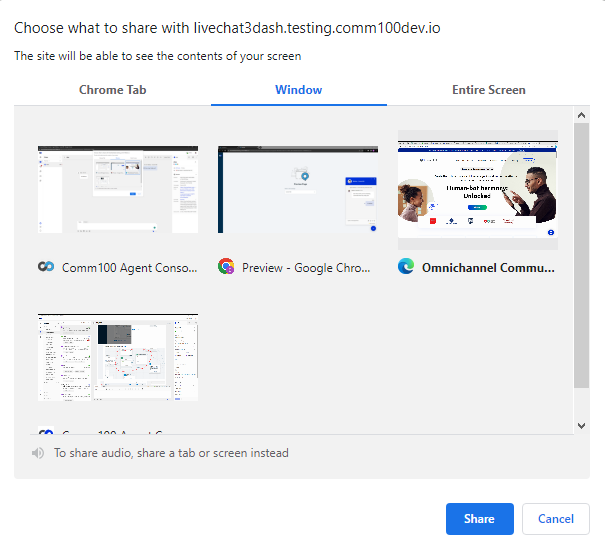
When an agent chooses to share their screen with a visitor, they need to first specify the content to be displayed. The available options may vary depending on the Agent Console being used by the agent.
For agents using the Web Agent Console, options include displaying a browser tab, an application, or an entire screen. The content being shared within the browser tab will be outlined in a blue or red frame.
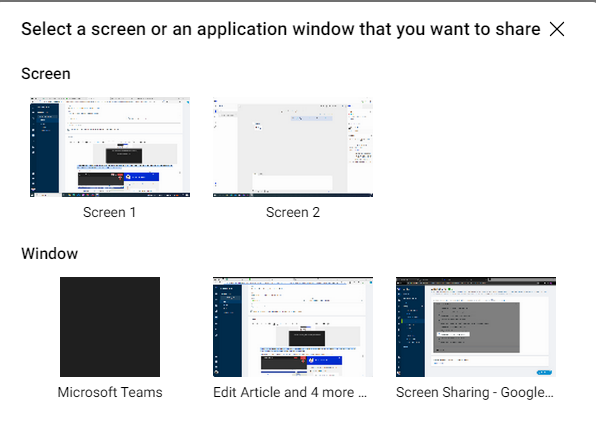
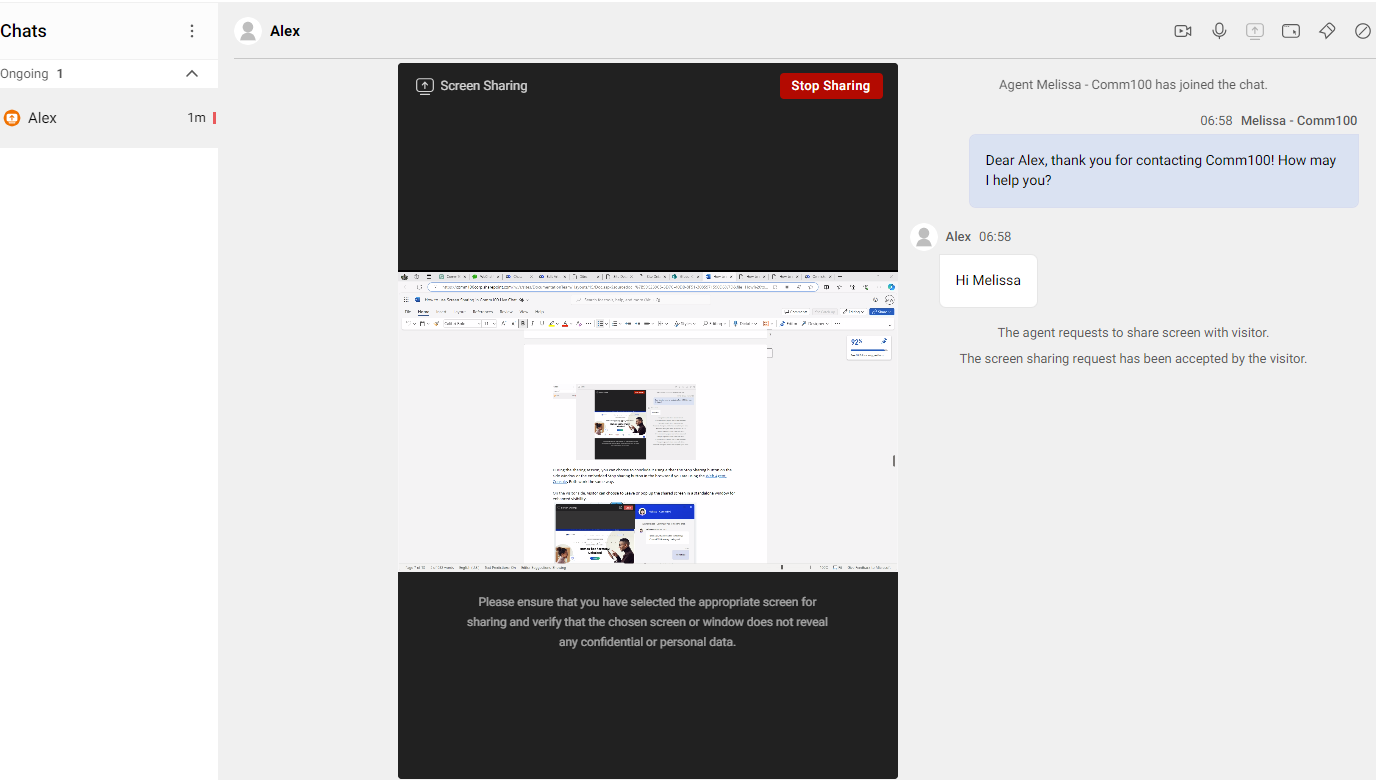
For agents using the Desktop Agent Console, they can choose to display either a screen or an application. When sharing their screen, the selected screen will be highlighted with a red frame.Once the request is accepted by the visitor, a side window appears on your side, presenting a preview screen of the shared content. Furthermore, a general message reminds you not to disclose any confidential or personal information while sharing also displays.
During the sharing session, you can choose to conclude it using either the Stop Sharing button on the side window or the embedded Stop sharing button in the browser if you are using the Web Agent Console. Both work the same way.
On the visitor side, visitor can choose to Leave or pop up the shared screen in a standalone window for enhanced visibility.
The popped-out window can also be popped back as a side window.
- Request visitor to share screen
Screen Sharing Request from Visitor Side
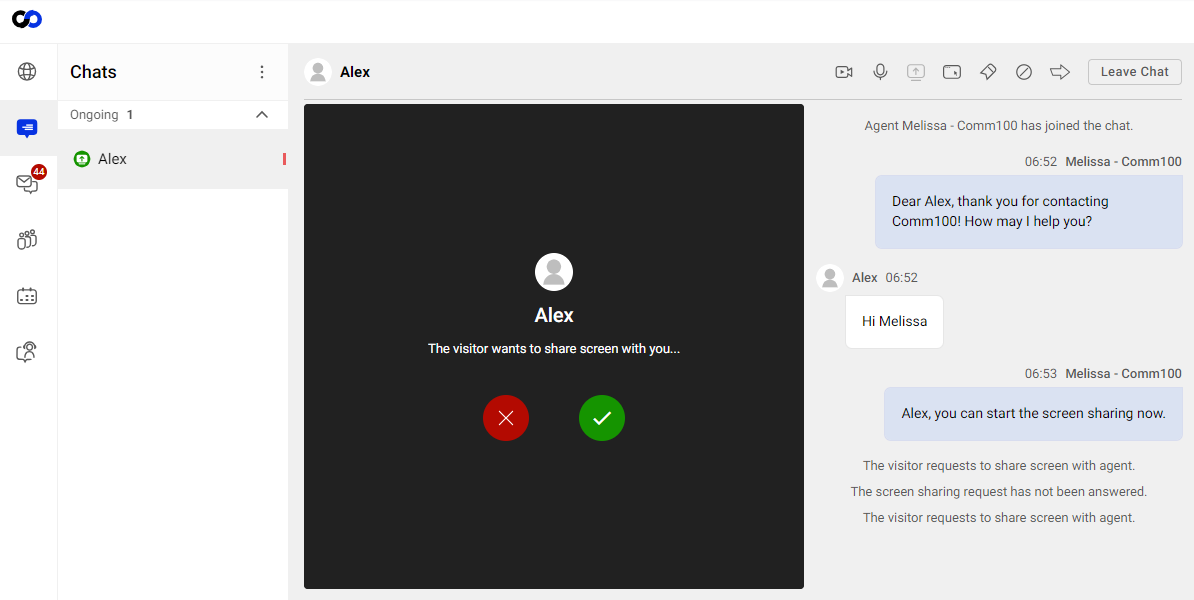
To initiate a screen sharing session from the visitor side, the visitor can click on the Screen Sharing button.
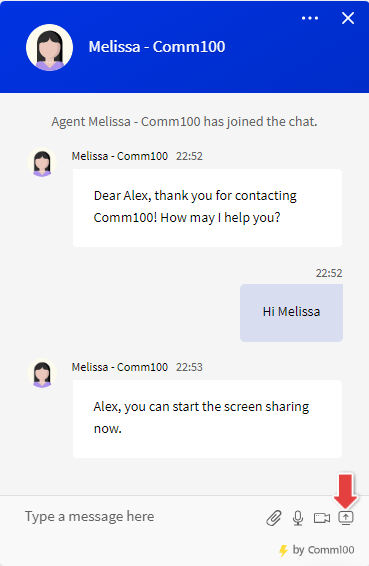
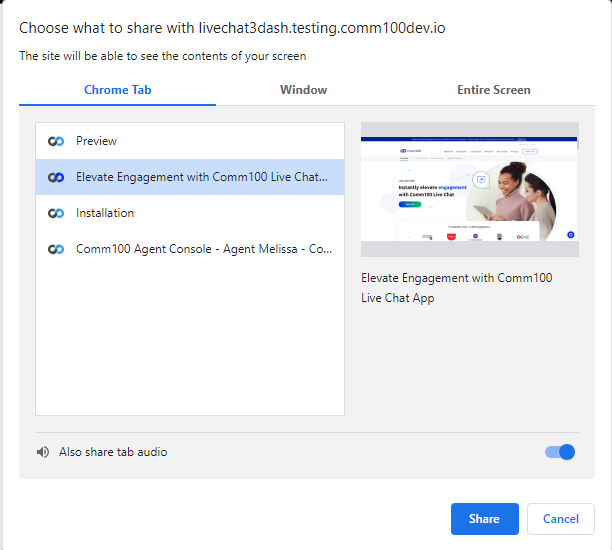
A pop up window appears, prompting the visitor to choose the content they’d like to share, which can be a browser tab, an application or their entire screen.
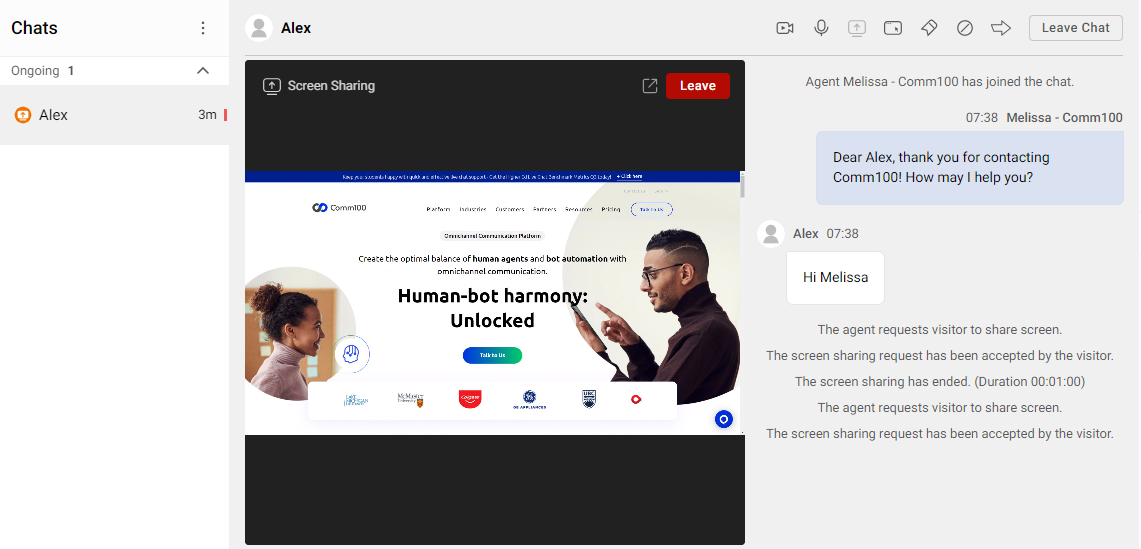
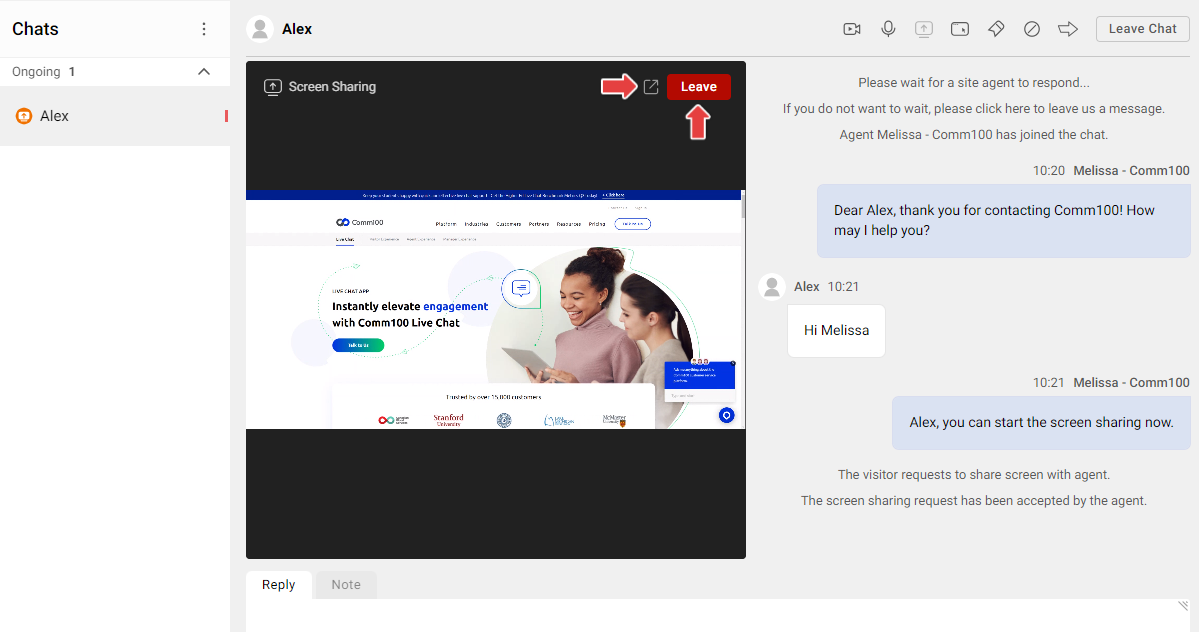
After the agent accepts the request, the visitor’s chosen screen will be displayed on the agent’s side.
On the agent side, you have the option to Leave or pop up the shared screen in a standalone window for better visibility. The popped-out window can also be popped back into the Agent Console.
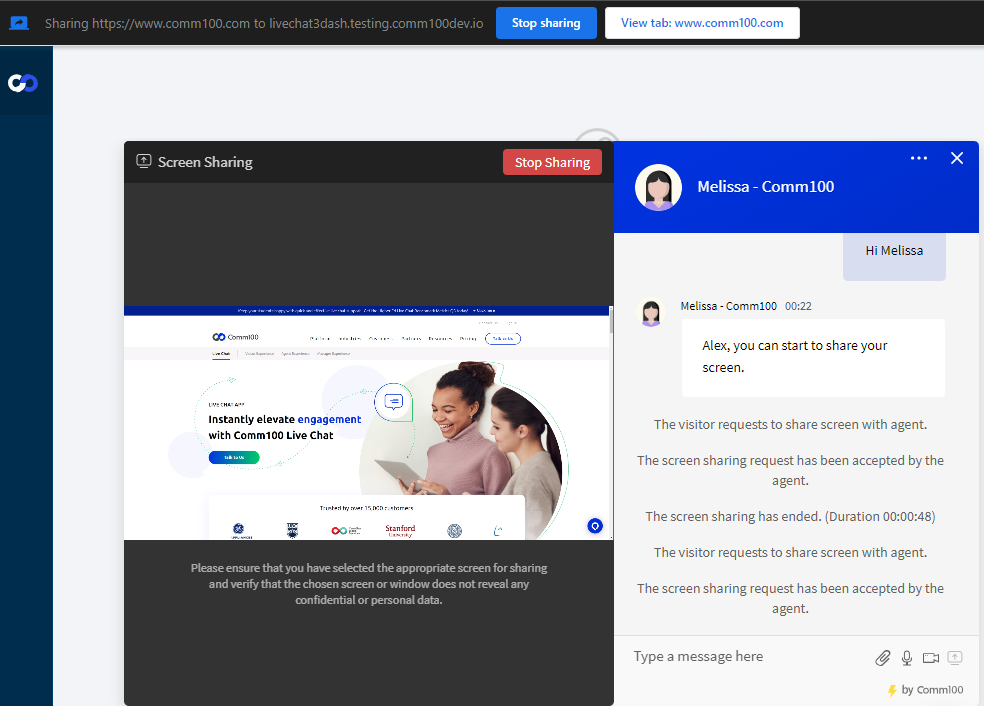
While on the visitor side, the content being shared within the browser tab will be outlined in a blue or red frame. They can choose to stop the sharing either from the Stop Sharing button on the side window or from the embedded Stop sharing button in the browser. Both function the same way.
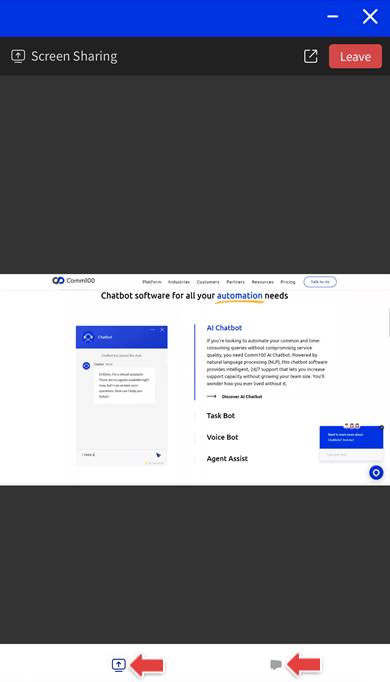
When the visitor is using a mobile device to connect with you, you have the capability to share your screen with them during a chat.

Once the visitor accepts the request, they can promptly view your specified content on their phone. Additionally, they can seamlessly switch between screen sharing and chatting for a more interactive experience.