Services are various types of meetings that your customers may want to schedule with you, such as a product demo, a 30-minute consultation phone call, and so on. Each service has a dedicated webpage that can be accessed by customers to make an appointment. You can define the meeting duration, appointment notification and assign agents for each service separately.
To create a Service, follow these steps:
- Log in to the Comm100 Control Panel, go to Booking > Services.
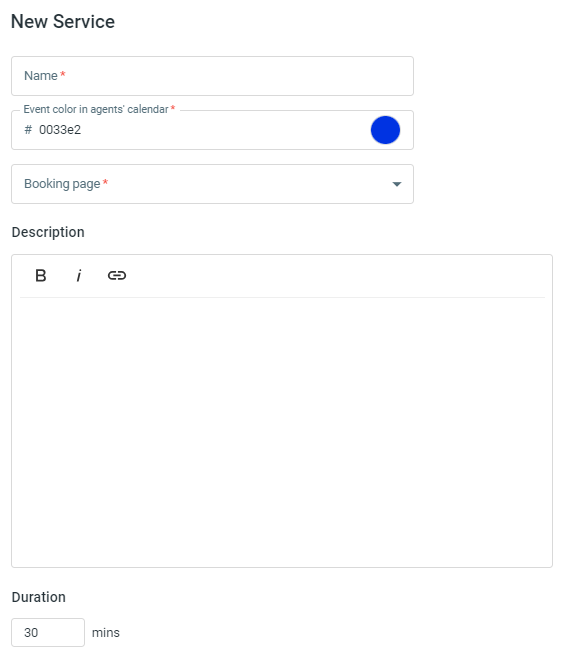
- On the Services page, click New Service.
- Input the service name, set the color, booking page, and duration for the service.Note:
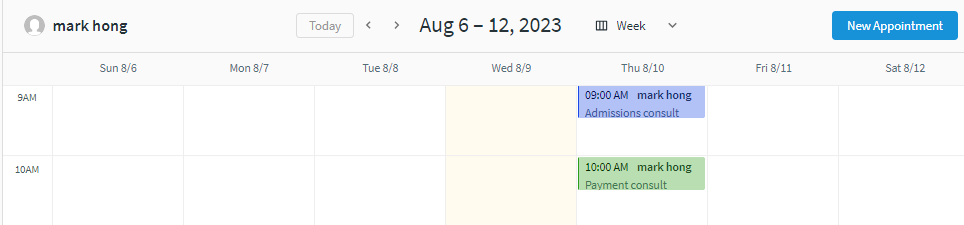
- The color defined for the service is used to display the service on agents’ calendar, so that agents can easily distinguish among different service types.
- One service can be associated with one booking page only. However, one booking page can contain multiple services.
- The color defined for the service is used to display the service on agents’ calendar, so that agents can easily distinguish among different service types.
- Click Save. A service is created successfully.
Set Up a Service
Before launching a booking page, you need to complete the service settings including defining the information to collect from visitors, assigning agents, setting service availability, and so on. After completing the settings, you can get and implement the link of the service page or the booking page that the service belongs to on your website to make it accessible to your customers.
Set Up the Service Page
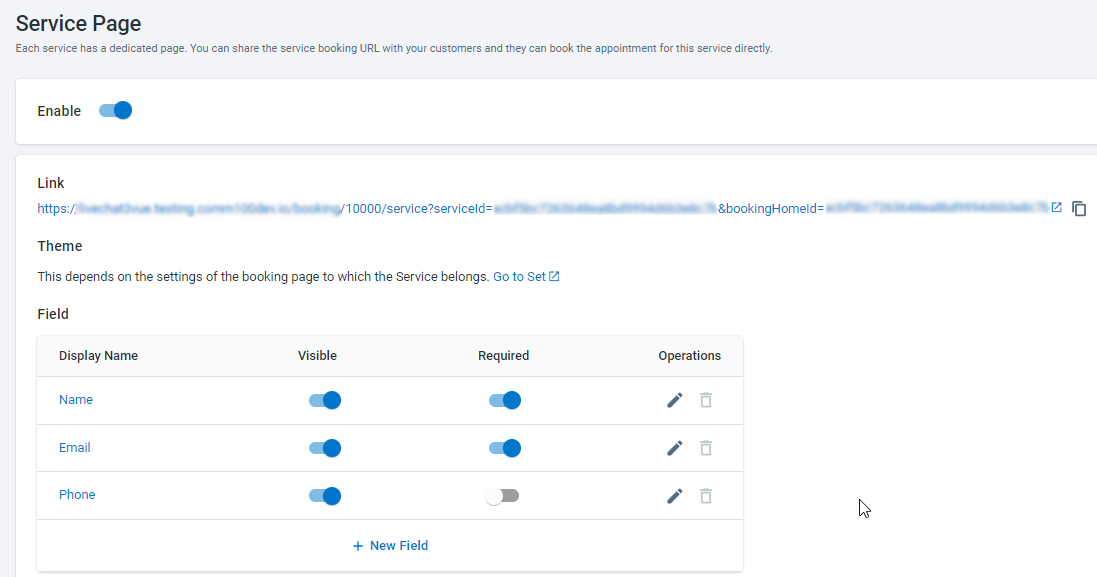
The service page is a webpage dedicated to a service through which your customers can book an appointment. You can customize the information collection form, assign agents, and define other scheduling rules such as whether to allow visitors to choose a particular agent.
- A service page can be disabled. When disabled, the service disappears from the booking page that it belongs to, and the link of the service page cannot be accessed.
- By default, a service page requires customers to provide information, such as name and email before making an appointment. You can customize the information items to collect from customers.
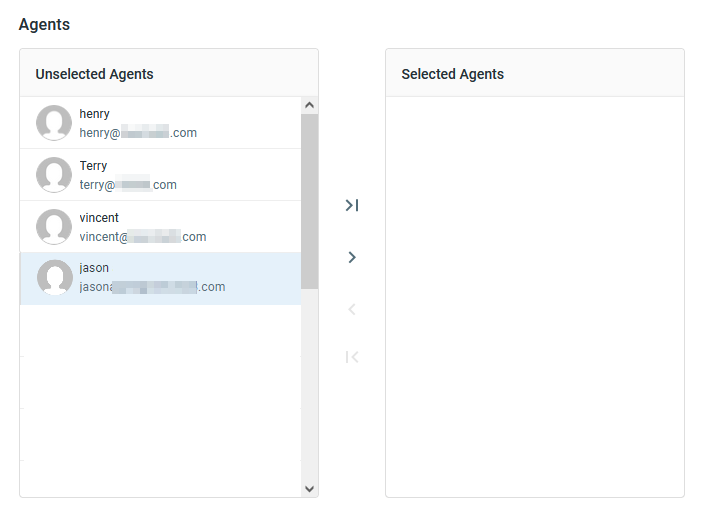
- You need to assign agents to a service to make the service bookable for customers. If you create a service and do not assign agents to the service, customers will see a notice on the service page that the service does not accept any appointments.
- You can define the following scheduling rules for each service separately:
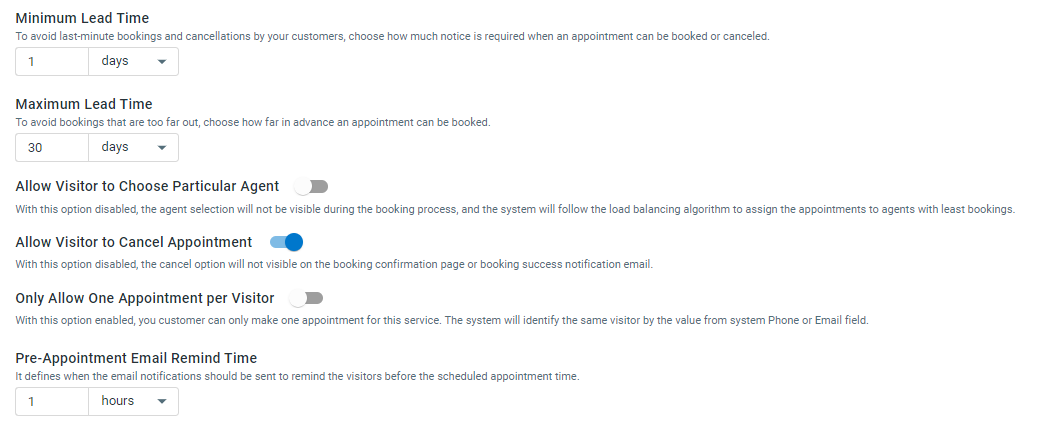
- Minimum Lead Time
How close to the meeting time that customers can make or cancel an appointment. For example, if the Minimum Lead Time is 24 hours, your customers can only book or cancel an appointment 24 hours in advance. The default value is 1 day. The default value is 1 day. - Maximum Lead Time
How far in advance of the meeting time customers can make an appointment. The default value is 30 days. - Allow Visitor to Choose Particular Agent
Whether to allow visitors to choose a specified agent by themselves. When disabled, the system assigns the appointments to agents by following load balancing rules. This option is disabled by default. - Allow Visitor to Cancel Appointment
Whether to allow visitors to cancel a scheduled appointment. This option is enabled by default. - Only Allow One Appointment per Visitor
Whether to limit a visitor to book only one appointment for this service. The system identifies the visitor by the value of system fields Phone number and Email. Visitors are deemed to be the same one if they provided the same email or phone number. - Pre-Appointment Email Remind Time
The amount of time before the appointment to send the reminder email to customers.
- Minimum Lead Time
To set up the service page, follow these steps:
- On the Comm100 Control Panel, go to Booking > Services > Service Page.Note: If you have multiple service pages, make sure to choose the correct one from the drop-down list.
- (Optional) Perform the following operations based on your requirements:
- If you need to implement the service page separately, copy the webpage link.
- To change the theme of the service page, click Go to Set to change the settings for the booking page that the service belongs to.
- Edit the information fields that you want to collect from your visitors. You can set the fields as required or visible, or add new fields to the form.
- Choose the agents for the service.
- Set the scheduling rules for service.
- Click Save.
Set Up Service Availability
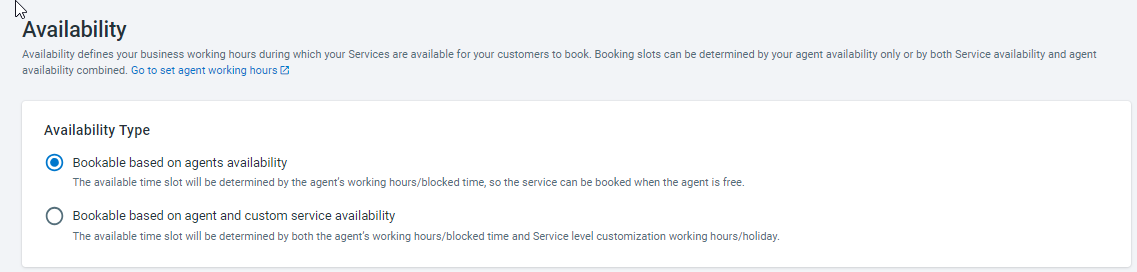
Service availability defines when the service is available for customers to schedule a meeting. Service availability can be based on agent availability only or a combination of agent availability and custom service availability.
- Based on agent availability only
The available time slot of the service is determined by the working hours and blocked times of all the assigned agents. - Based on agent availability and custom service availability
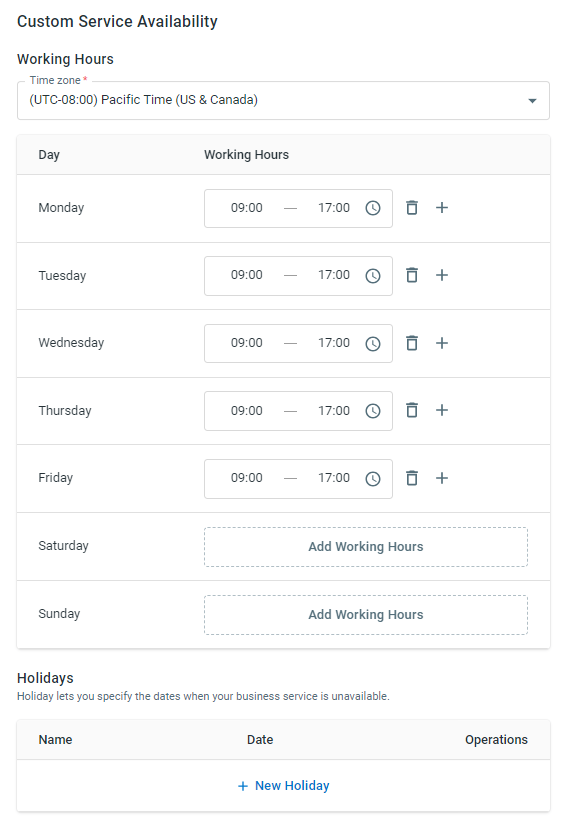
The available time slot of the service is determined by the availability of all the assigned agents and the customized service availability, including working hours and holidays.
To set service availability, follow these steps:
- On the Comm100 Control Panel, go to Booking > Services > Availability.Note: If you have multiple services, make sure to choose the correct one from the drop-down list.
- On the Availability page, choose the availability type according to your requirements.
- If you choose the Bookable based on agent and custom service availability type, set the working hours and holidays.
- Click Save.
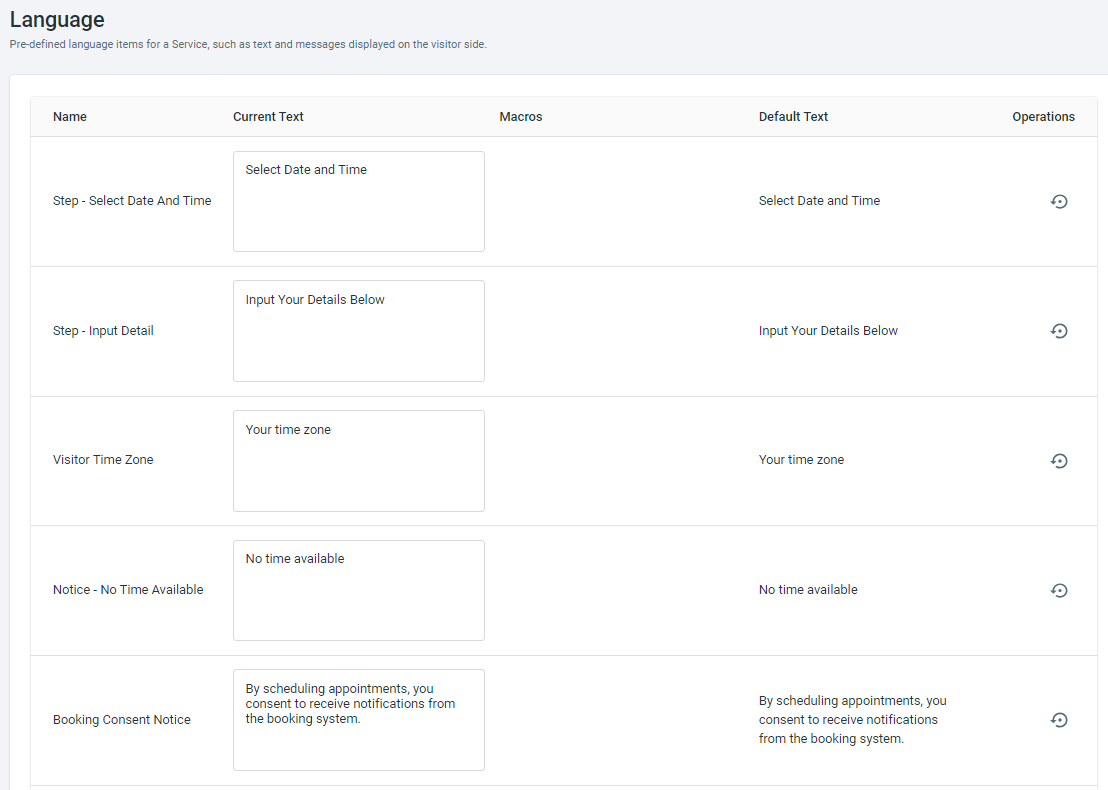
Edit Visitor-Side Text and Messages
You can modify all the language items on the booking webpage throughout the scheduling process, including the button text on the booking page, the notice when an appointment is booked, cancelled, and so on.
To modify visitor-side language items, follow these steps:
- On the Comm100 Control Panel, go to Booking > Services > Language.
- On the Language page, modify the language items based on your needs.
- Click Save.
Customize Email Notifications
Comm100 Booking allows you to send email notifications to both customers and agents when an appointment is created, rescheduled, cancelled, and so on. Comm100 provides email notification samples for the following occasions, which you can customize according to your needs.
- Email to the visitor when an appointment is created
- Email to the agent when an appointment is created
- Email to the visitor when an appointment is rescheduled
- Email to the agent when an appointment is rescheduled
- Email to the visitor when an appointment is cancelled
- Email to the agent when an appointment is cancelled
- Email to the visitor when the visitor does not show for the scheduled appointment
- Email to the agent when the visitor does not show for the scheduled appointment
- Email reminder to the visitor before the scheduled appointment
To customize the email notifications, follow these steps:
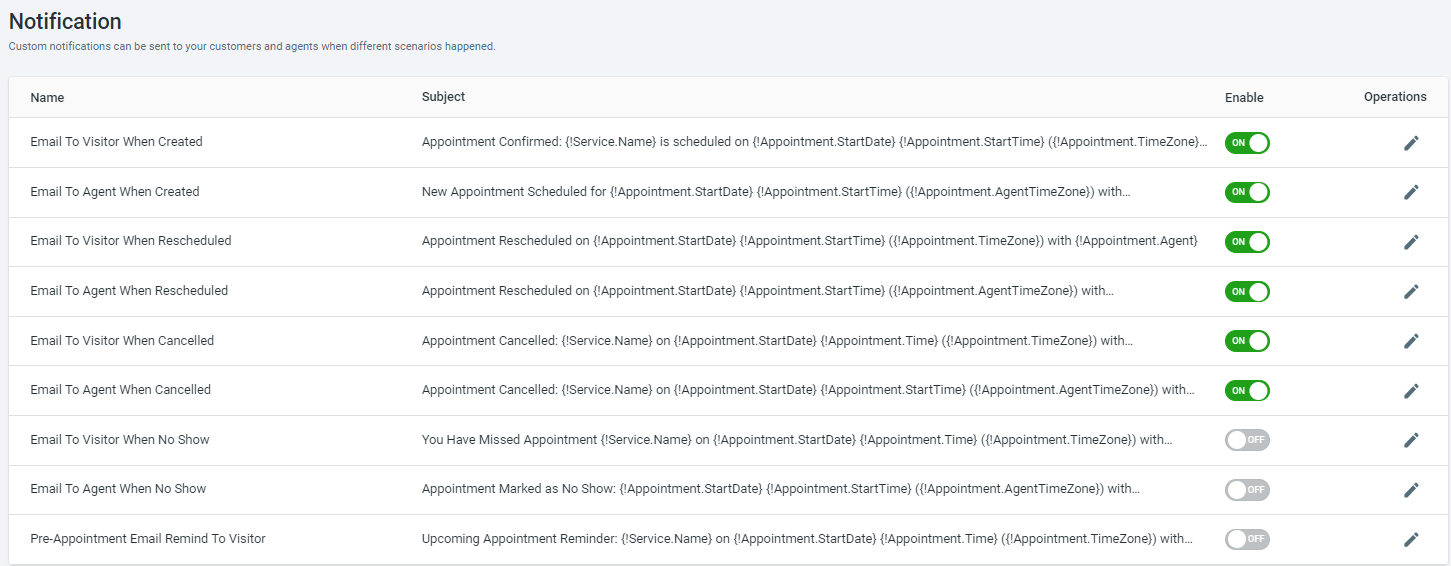
- On the Comm100 Control Panel, go to Booking > Services > Notification.Note: If you have multiple service pages, make sure to choose the correct one from the drop-down list.
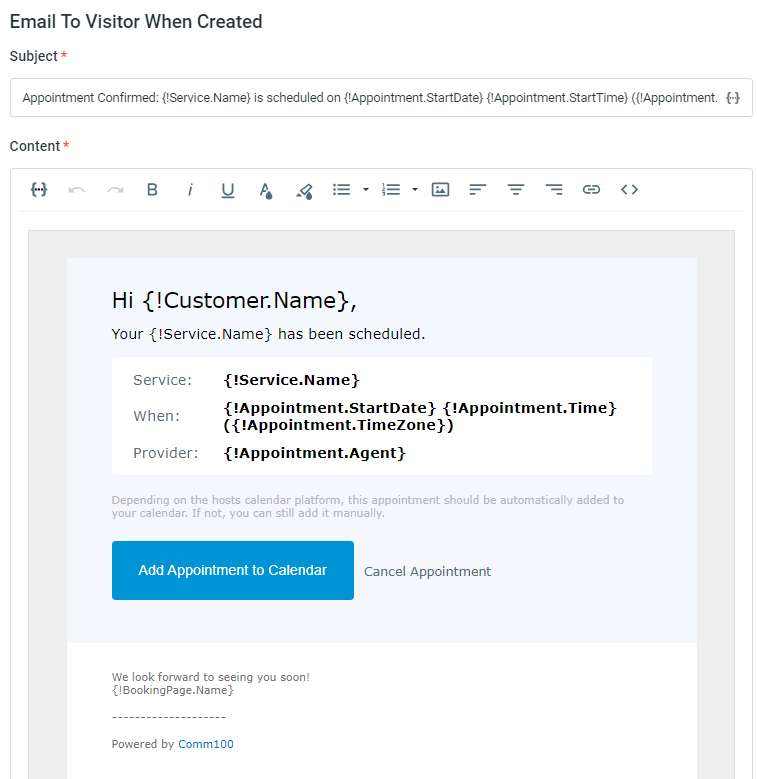
- On the Notification page, click the edit icon against the email notification you want to edit.
A predefined notification email appears from the right-side drawer. - On the right-side drawer, modify the email subject or content based on your needs.Note:
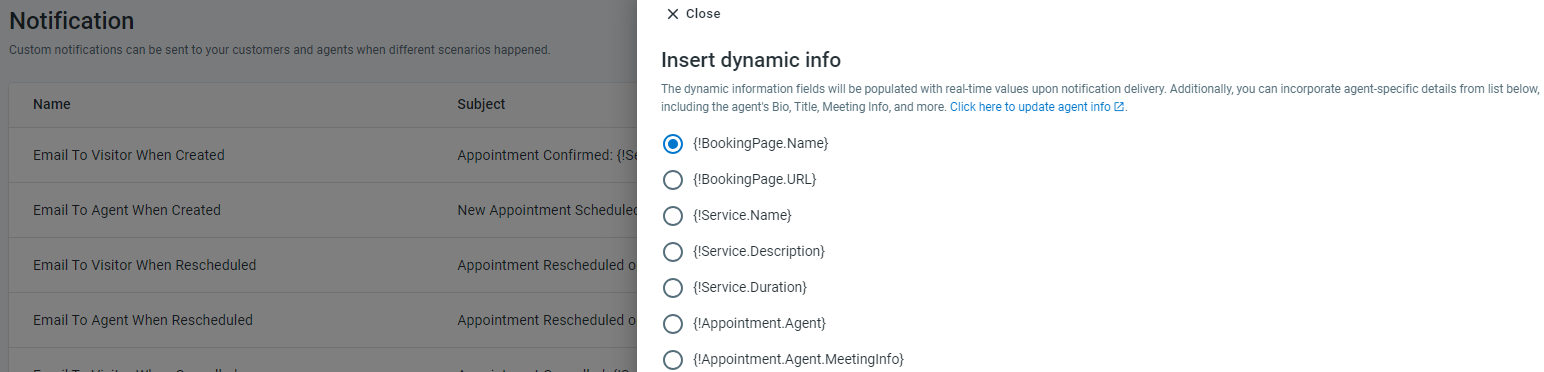
- The dynamic information contained in the email will be replaced by the actual value when being sent. For example, {!Service Name} will be replaced by the service's actual name.
- You can insert agent-specific information, such as agents' name, bio, and meeting URL into the notification email. Agents' information needs to be updated from your Control Panel > Global Settings > Agents.
- Click Save.