How to Manage Agent Permissions
When a Comm100 agent is created, you can manage agent permissions by editing agents individually or by granting role permissions. An agent has both the permissions that are granted individually and the permissions of all the roles that the agent has been assigned.
- To grant permissions to an individual agent, enable individual agent permissions under Global Settings > People > Agents.
- To grant permissions to all agents with the same role, enable role permissions under Global Settings > People > Roles. To learn more about setting up roles, see this article.
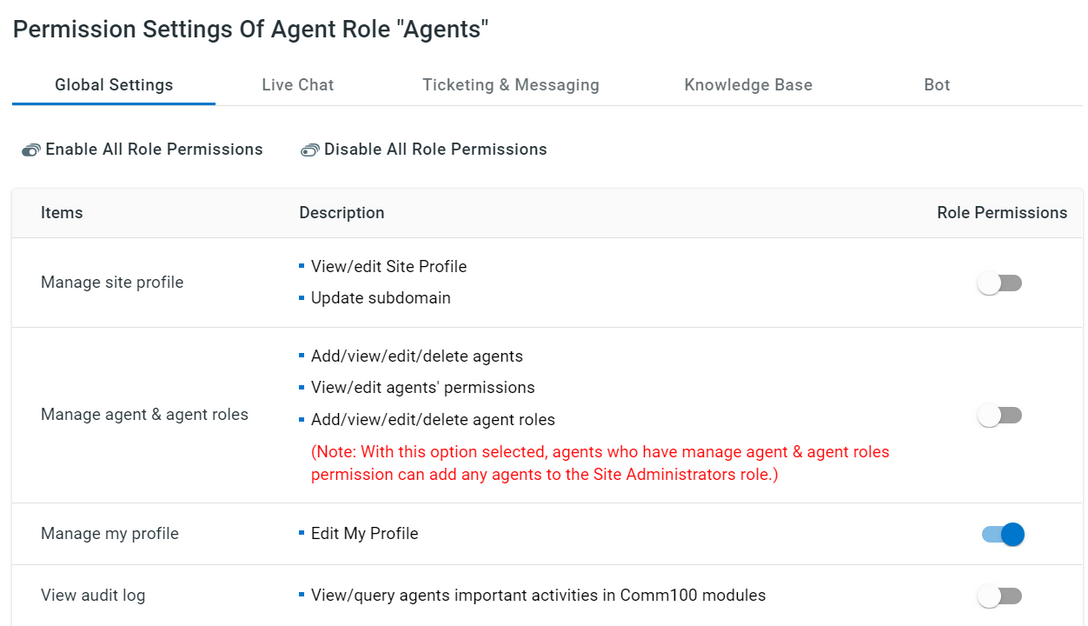
By default, an agent has the following permissions. If you are a site administrator or have permission to manage agents, you can manage your agents’ permissions.
| Product / Scope | Default Permissions of the Agent Role |
| Live Chat | Accept chats View all chats and offline messages View my departments' chats and offline messages View my own chats and offline messages View reports Refuse chats Invite visitors to chat Join chats Transfer chats Monitor my departments' chats Capture View all in site visitors |
| Ticketing & Messaging | Manage assigned to me tickets Manage tickets in my departments View tickets in my departments Manage tickets that belong to any department View reports |
| AI & Automation | View AI Agent Reports |
| Queue | Manage my queue and available serving agents |
| Booking | Manage my own booking page |
| Knowledge Base | N/A |
| Contact Management | View Contacts View Contact Identity |
| Global Settings | Manage my profile View agent report Manage private canned messages Chat with other agents View all agents Log into Agent Console Custom SMTP Servers |
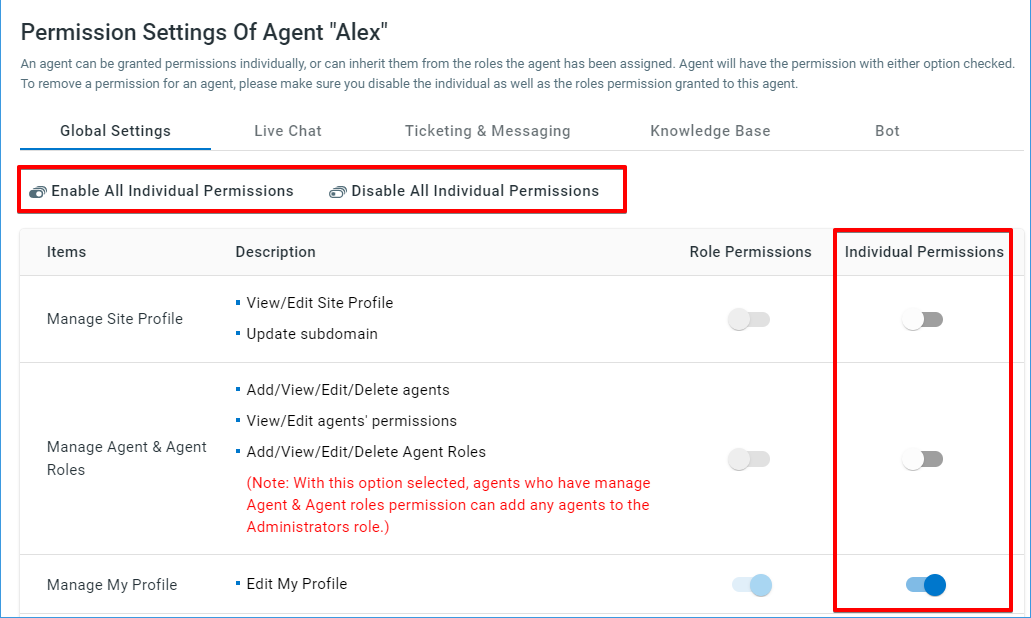
Enable or Disable Individual Agent Permissions
To enable or disable individual agent permissions, follow these steps:
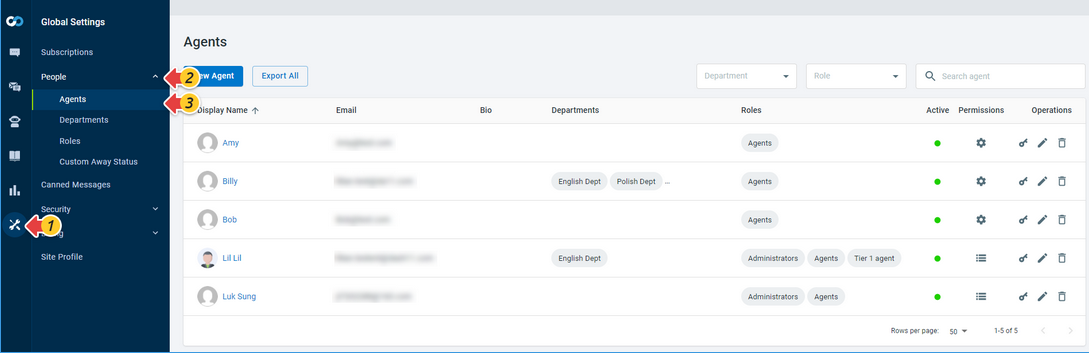
- Log in to your Comm100 Control Panel.
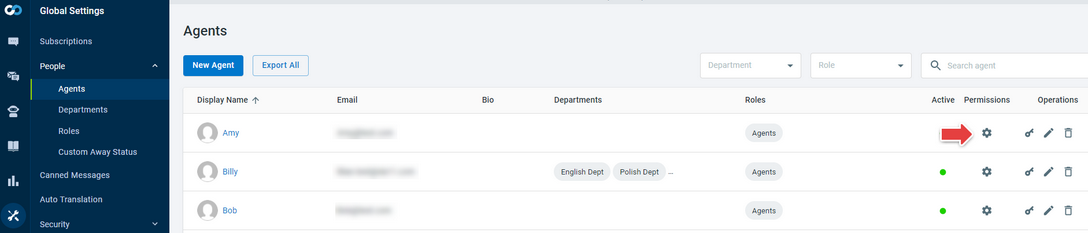
- From the left navigation menu, go to Global Settings > People > Agents. A list of agents is displayed on the Agents page.
- Locate the agent that you want to enable or disable the permission for, and click the gear icon in the Permissions column.
- In the Permission Settings drawer that appears, turn on or off the toggle keys of the target permissions in the Individual Permissions column. To enable or disable all the permissions under a tab, click Enable All Individual Permissions or Disable All Individual Permissions.
- Note: An agent has the permission if either Role Permissions or Individual Permissions is enabled. To remove an agent's permission, you need to disable both the individual permissions and the role permissions granted to this agent.
- Click Save.
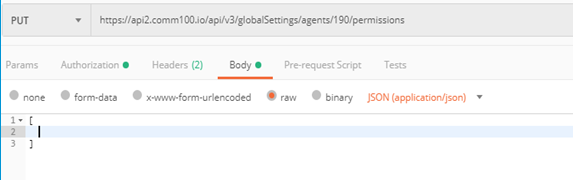
Remove Individual Agent Permissions by API
Comm100 provides Restful API for flexible integrations. You can remove an individual agent's all permissions by calling API. To learn more about Comm100 API, see the Comm100 RESTful API guide.
To remove individual agent permissions by API, follow these steps:
- The correct API endpoint should be Global > Permission.
- PUT https://dash11.comm100.io/global/agents/{agentId}/permissions
- Replace agent id with the correct one.
- The request body (JSON form) should be kept empty and surrounded in square brackets, which means you should update with no permission.
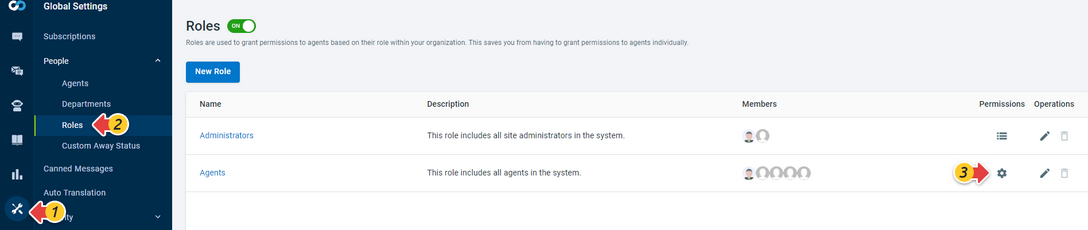
Enable or Disable Role Permissions
You can manage role permissions to grant permissions to or remove permissions from all the agents with the same role.
To enable or disable role permissions, follow these steps:
- Log in to the Comm100 Control Panel.
- From the left navigation menu, go to Global Settings > People > Roles.
- On the Roles page, a list of roles is displayed.
- Locate the group that you want to disable the permission for, and click the gear icon in the Permissions column.
- Turn on or off the toggle keys of the corresponding permissions.
- Click Save.