On occasions when you want to send the same response to multiple customers, the batch reply option is an efficient tool to reduce manual work and improve productivity.
In Comm100 Ticketing & Messaging, you can send the same reply to multiple tickets with one action.
Enable Agents’ Permission
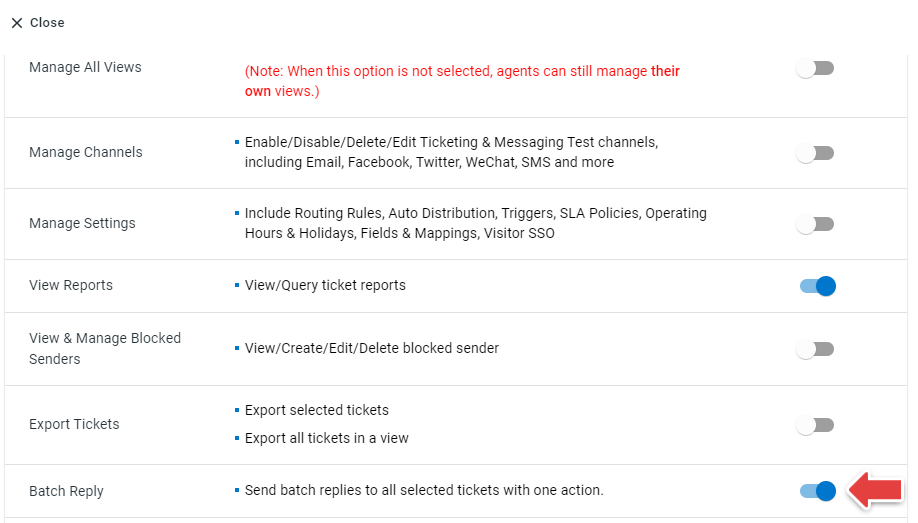
Agents must have the Batch Reply permission to send mass replies. The permission is disabled by default. To enable agents’ permission, follow these steps:
- Log in to your Comm100 Control Panel.
- From the left navigation menu, go to Global Settings > People > Agents. A list of agents is displayed on the Agents page.
- Locate the agent that you want to enable or disable the permission for, and click the gear icon in the Permissions column.
- In the Permission Settings drawer, click the Ticketing & Messaging tab, and turn on the Batch Reply permission toggle.
- Click Save.
Send Mass Replies to Tickets
With the Batch Reply permission, agents can send the same response to multiple tickets with one operation. The system sends the response through the default channel account for each ticket.
- For new tickets that are converted from Live Chat and offline messages, the default channel account is defined by Ticketing & Messaging > Channels > Email from the Comm100 Control Panel.
- For tickets with interaction history, the default channel account is the account through which the latest interaction in the ticket was made.
To batch reply to tickets, follow these steps:
- Log in to your Agent Console, and navigate to the Ticketing & Messaging tab.
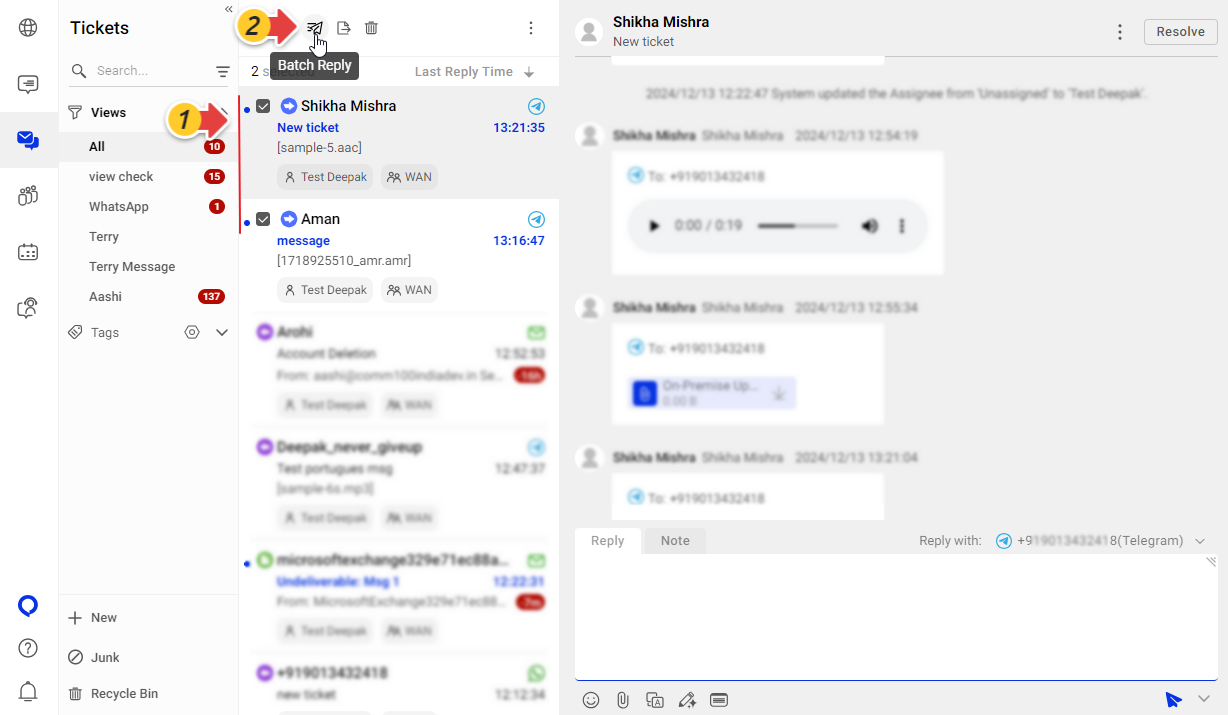
- Select the target tickets from the ticket list, then click Batch Reply on the top bar. You can select up to 60 tickets at a time.
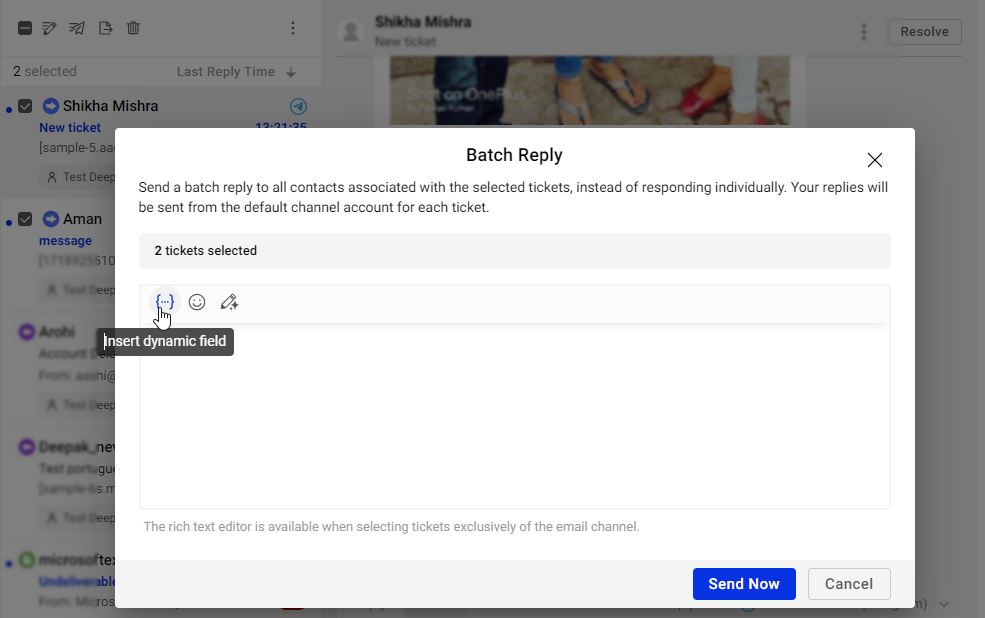
- Compose the response in the popup.Note:
- You can insert dynamic info such as the contact name and emojis to make your response more personalized. When Agent Assist is enabled, you can use text enhancement before sending the message.
- If all the selected tickets are of the email channel, a rich text editor is available. You can format your response and add attachments as needed.
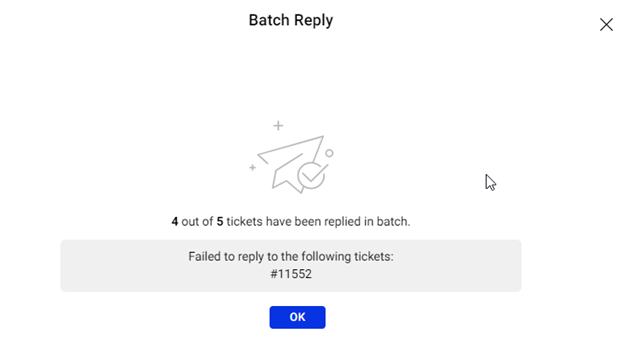
- Click Send Now. The system sends the response to all the selected tickets and shows the sending results.Note: The sending results indicate the success or failure of the send action. For tickets that have been successfully replied to, the receiver side may fail to receive the message due to other causes.
Failure Causes
During a batch reply, the reply will fail under the following occasions:
- For Facebook Messenger and WhatsApp tickets, there is a 24-hour session window. Sending replies outside the allowed time window will fail.
- The default Reply with channel account is unavailable. For example, when the latest message in the ticket was sent to an email account which was then disconnected, the reply will fail.
- When the contact identity is unavailable. For example, if the default channel account is to reply is email, and the email identity of the contact has been deleted.
- For tickets in public facing channels like Facebook Visitor Post, Facebook Wall Post, and Instagram Post, the batch reply will fail.


