When a visitor visits your page and asks a question to the Chatbot, a conversation begins. Your Chatbot greets the visitor and helps them with their questions. Use quick replies and create flows to let the Chatbot guide your visitors to specific intent.
Using Quick Replies to Create Flows
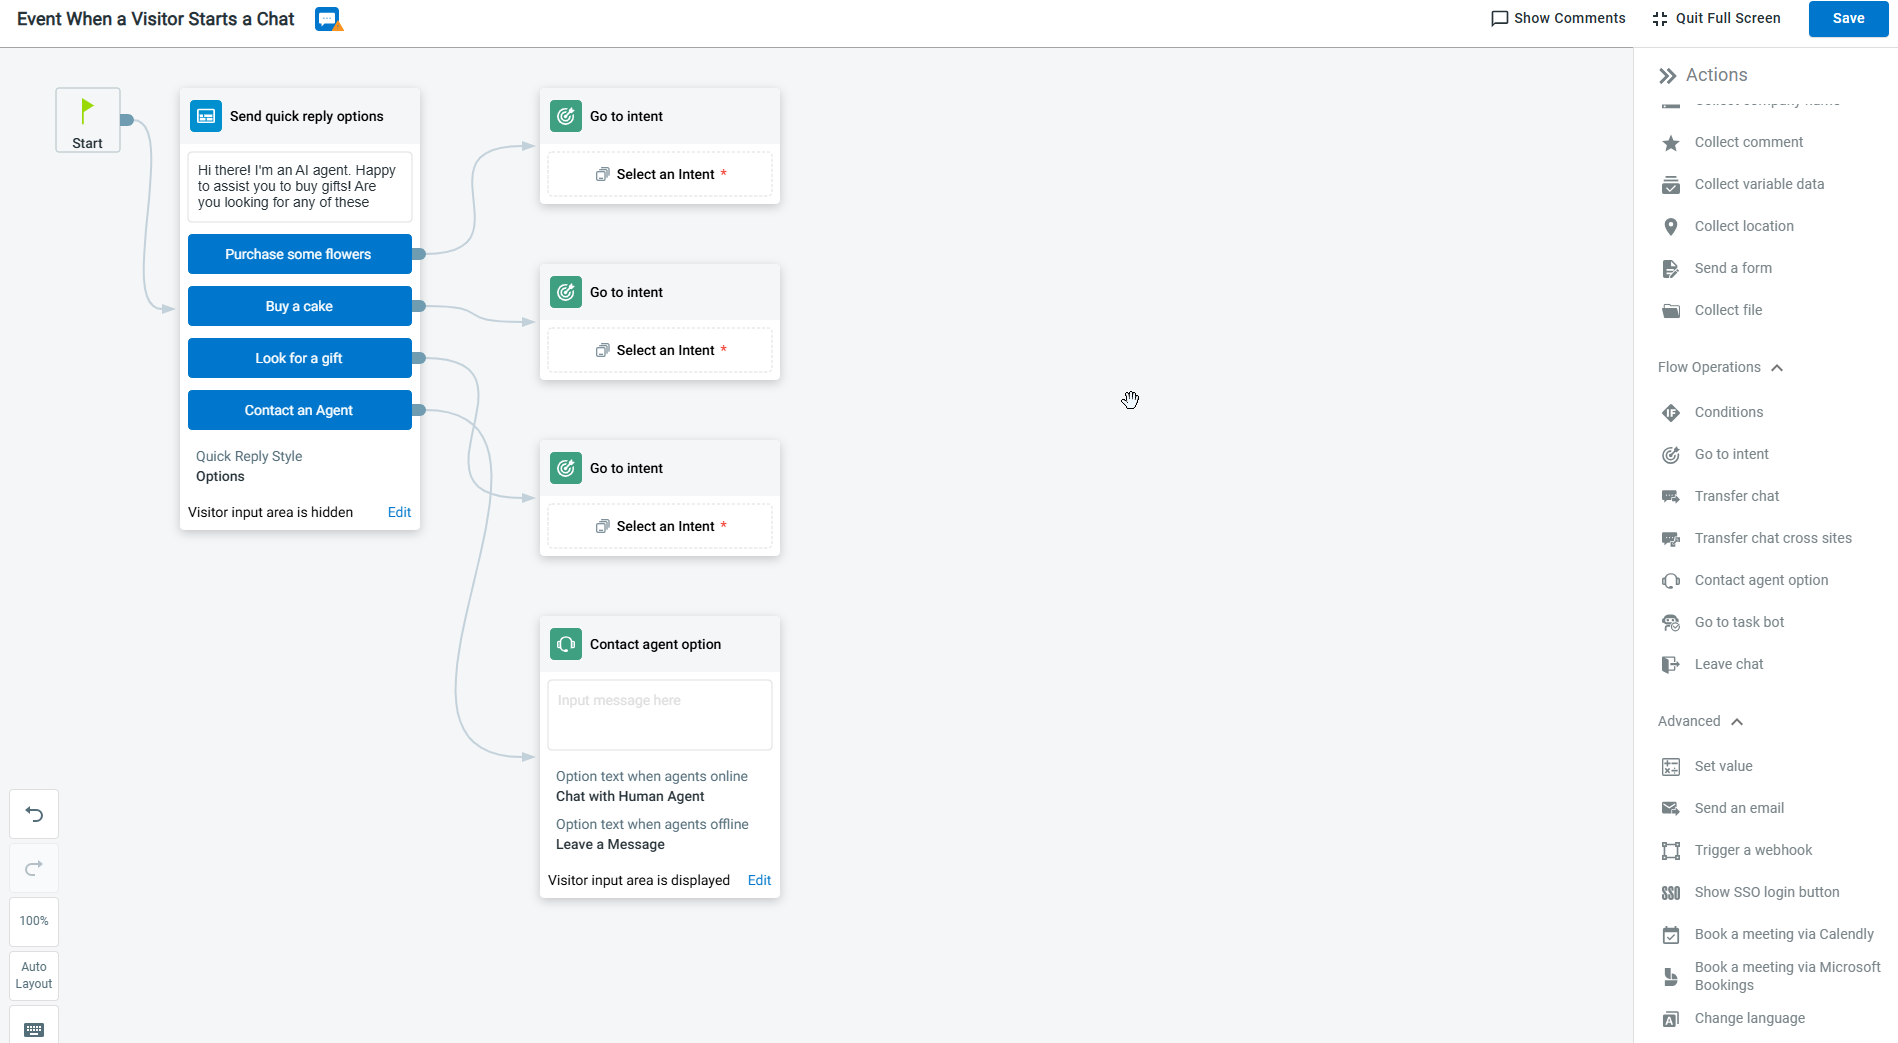
Consider a scenario: You run an online gift store and sell things like cakes, flowers, candles, and chocolates. Your Chatbot can present a few quick replies you created to the visitor and continue the conversation.
Each of the quick replies takes the visitor to the linked intent, and the flow continues.
There can be cases when the options you provide, do not meet the visitor’s requirement. The Contact agent option is useful in such scenarios.
You can also consider using Canned Quick Replies. You can use canned quick replies in cases where any quick reply is being reused.
Creating Quick replies
You can add quick replies to Event messages and to the Answers section of the intents.
- These steps show how to navigate from the Event message and create quick replies, and it is a similar process to add quick replies to any intent.
- You can add quick replies on Live Chat, Twitter Direct Message, and Facebook Messenger channels.
To create quick replies, follow these steps:
- Log in to your Comm100 Control Panel.
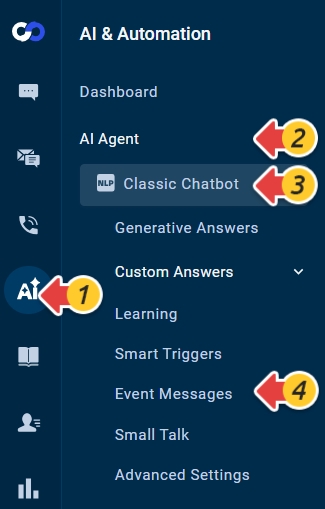
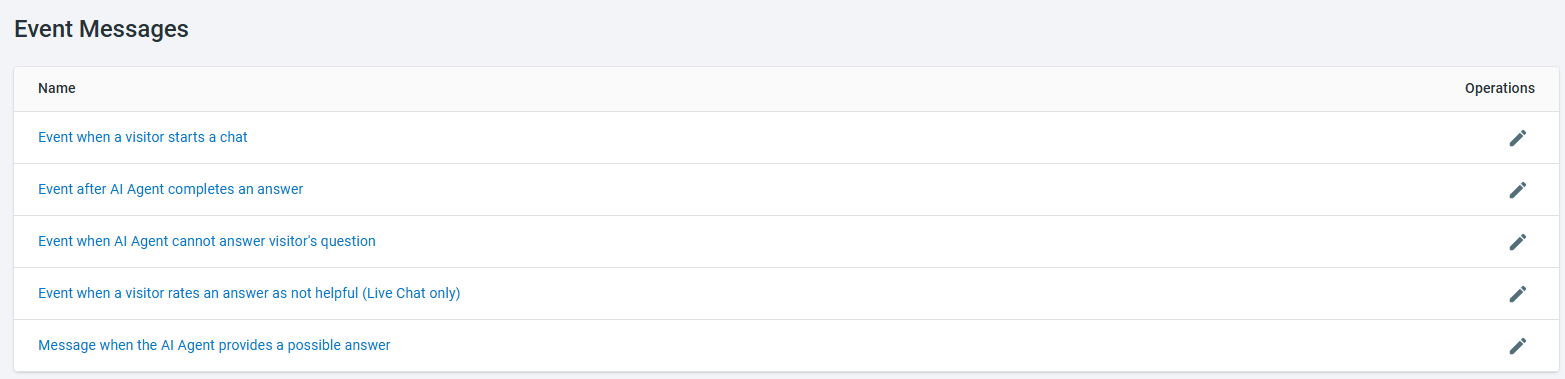
- From the left navigation menu, go to AI & Automation > AI Agent > Event Messages. If you have multiple AI Agents, make sure to choose the correct one from the drop-down list.
- On the Event Messages page, click the pencil icon beside the Event when a visitor starts a chat.
- From the Actions pane, drag the Send quick reply and click the plus icon to input the option text. Note: You can choose to disable the typing option for your visitors. Use the Allow visitors to use the input area option to enable or disable the typing option.
You can link each option to an Intent. Choose an intent from your intent library and link the intent. You can also provide the option to contact an agent.
- Click Save.
Creating Canned Quick replies
For frequently used quick replies, you can consider using the Canned Quick Replies. These can easily be re-used on other intents.
You can add canned quick replies to Event messages and to the Answers section of the intents.
To create canned quick replies, follow these steps:
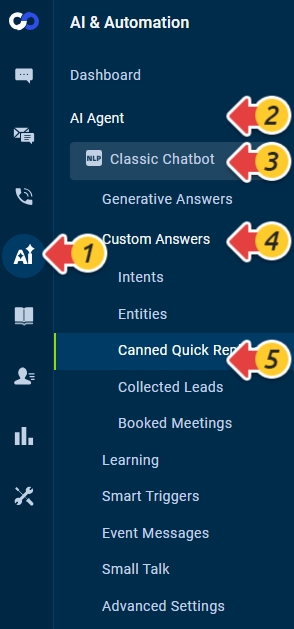
- Log in to your Comm100 Control Panel.
- From the left navigation menu, go to AI & Automation > AI Agent > Custom Answers > Canned Quick Replies. If you have multiple AI Agents, make sure to choose the correct one from the drop-down list.
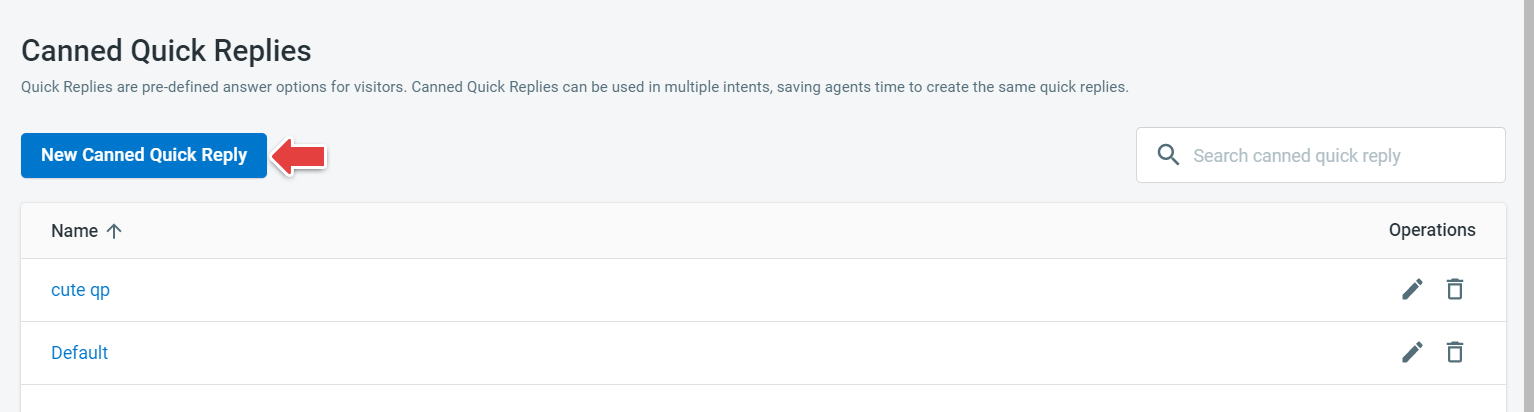
- On the Canned Quick Replies page, click New Canned Quick Replies.
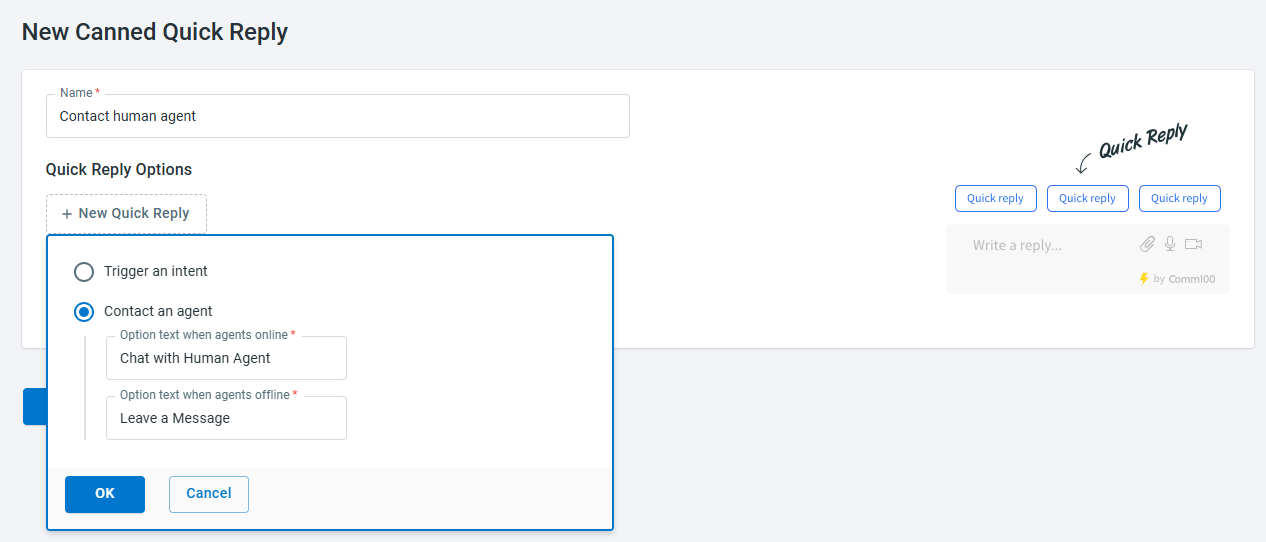
- On the New Canned Quick Reply page, enter a Name.
- Click New Quick Reply, choose the quick reply option, and click OK.
- Trigger an intent: Select an intent from your intent library
- Contact an agent: adjust the option text when agents are online or offline.
- Click Save.