Comm100 Anytime Chat allows you to offer round-the-clock service and let your customers reply according to their own schedules. You and your customers can message each other in the same conversation, and there are no more missed chats. This gives you and your customers more flexibility to connect.
You can perform the following operations in the Control Panel to create and manage Anytime Chat:
- You can add a new Chat Widget.
- You can Edit, Install Code, Copy, Rename, and Delete any Chat Widget.
- You can use a certain condition while configuring the Routing Rules, Triggers, and SLAs.
- You can also use Credit Card Masking, and review the Anytime Chat Audit Logs and Reports.
Step by Step Instructions
To manage your Anytime Chat, follow these steps:
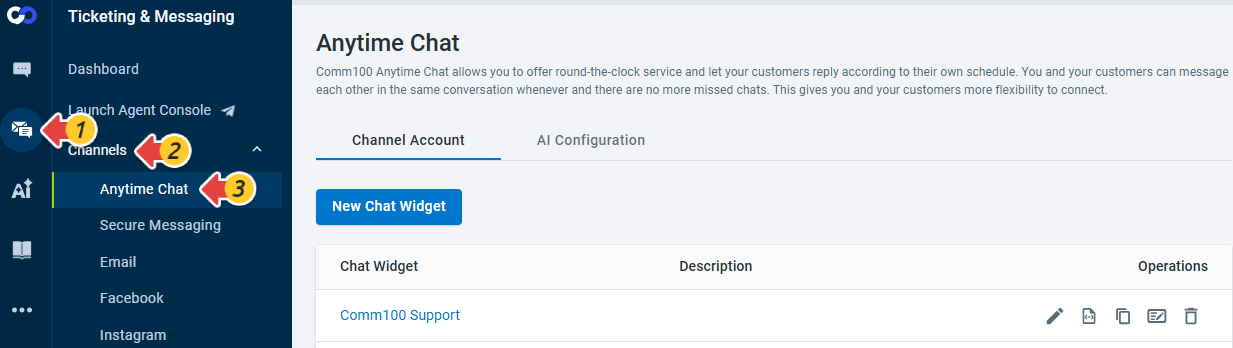
- Log in to your Comm100 Control Panel.
- From the left navigation menu, go to Ticketing & Messaging > Channels > Anytime Chat. The Anytime Chat page contains the list of existing chat widgets.
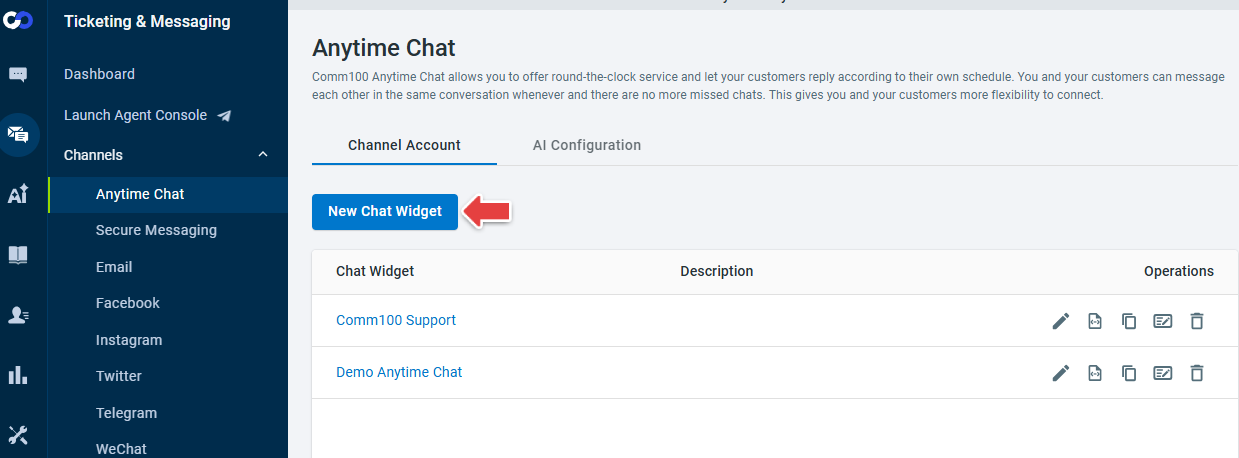
- Click New Chat Widget to add a new widget.
The New Chat Widget drawer appears. - On the New Chat Widget drawer, enter the Name, Description, and click Next.
- On the Chat Launcher tab, customize the launcher and click Save.
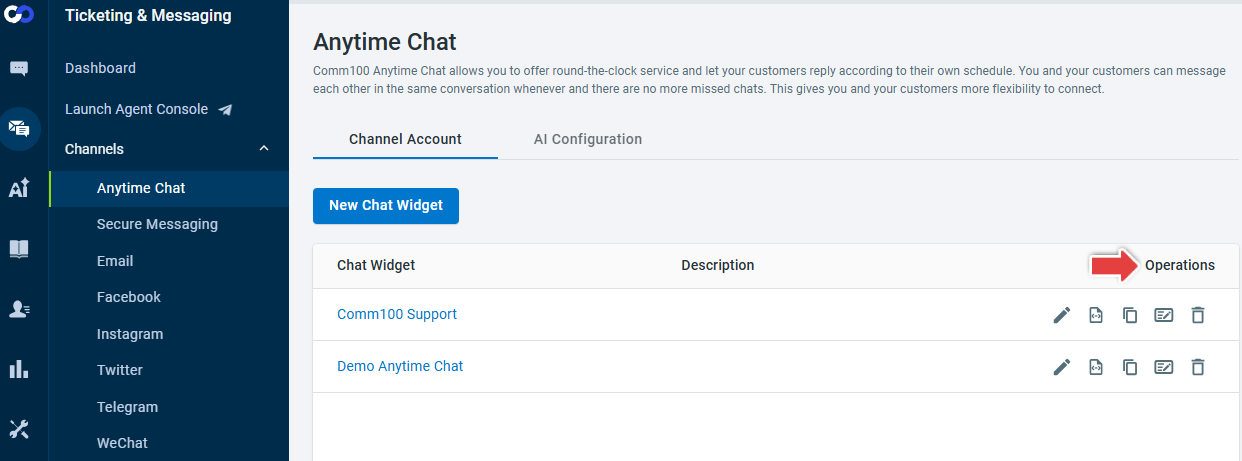
To learn more about configuring the Chat Launcher, see this article. - For a specific Chat Widget, navigate to the Operations column and perform the following actions:
- Edit: You can use the Edit operation to edit any existing Chat Widget configuration.
- Install Code: The Install Code operation allows you to navigate to the Installation tab and manage the installation.
- Copy: The Copy operation allows you to create a copy of any existing Chat Widget.
- Rename: The Rename operation allows you to rename any existing Chat Widget and change its description.
- Delete: You can use the Delete operation to delete any Chat Widget.
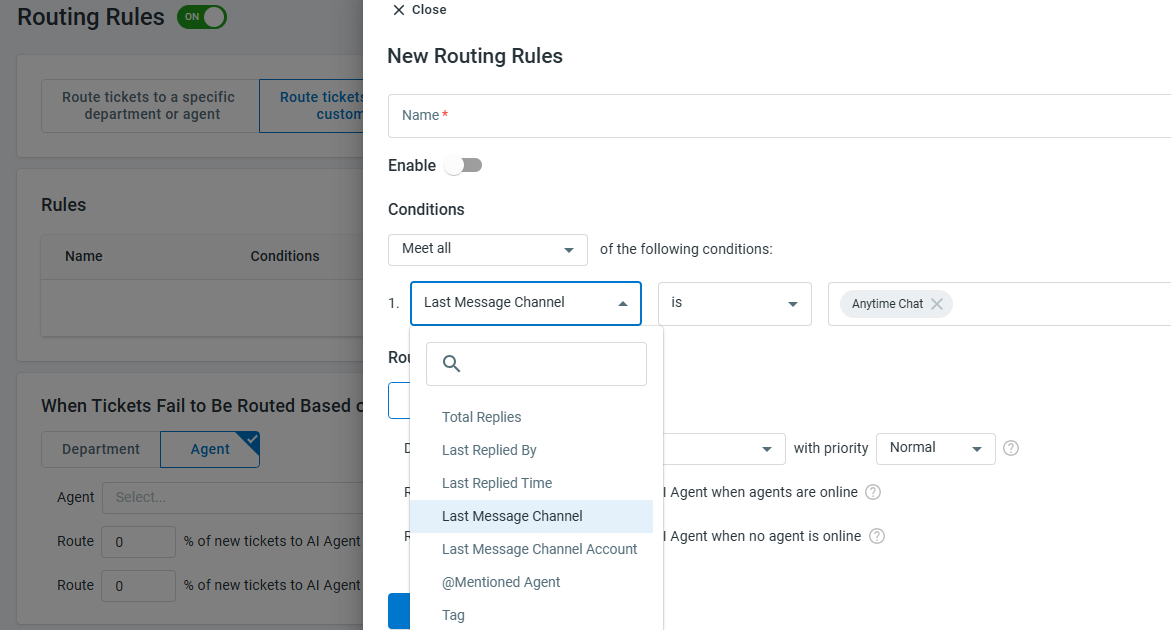
Once you successfully added a Chat Widget, you can also use Channel, Channel Account, Last Message Channel, and Last Message Channel Account conditions in the Routing Rules, Triggers, and SLAs of your Anytime Chat. You can enable Credit Card Masking in Global Settings Security to mask credit card numbers in Anytime Chat tickets for agents and review the Audit Log and Reports.
- Routing Rules: To use Channel, Last Message Channel, and Channel Account conditions in Routing Rules, navigate to Ticketing & Messaging > Settings > Routing Rules and select any of these conditions to create a New Rule.
For example, if you select Last Message Channel in Condition’s field, Anytime Chat appears as an option in the field values.
To learn more about configuring Routing Rules in Ticketing & Messaging, see this article. - Triggers: To use Channel, Channel Account, Last Message Channel, and Last Message Channel Account conditions in Triggers, navigate to Ticketing & Messaging > Settings > Triggers and select any of these conditions to create New Triggers.
For example, if you select Channel Account in Condition’s field, all your Anytime Chat accounts appear as an option in the field values.
To learn more about using Triggers in Ticketing & Messaging, see this article. - SLAs: To use Channel, Channel Account, Last Message Channel, and Last Message Channel Account conditions in SLA, navigate to Ticketing & Messaging > Settings > SLA Policies and select any of these conditions to create a New SLA Policy.
For example, if you select Channel in Condition’s field, Anytime Chat appears as an option in the field values.
To learn more about using the SLA feature in Ticketing & Messaging, see this article. - Credit Card Masking: To mask credit card numbers in the Anytime Chat tickets for agents, navigate to Global Settings > Security > Credit Card Masking and turn on the Credit Card Masking toggle key.
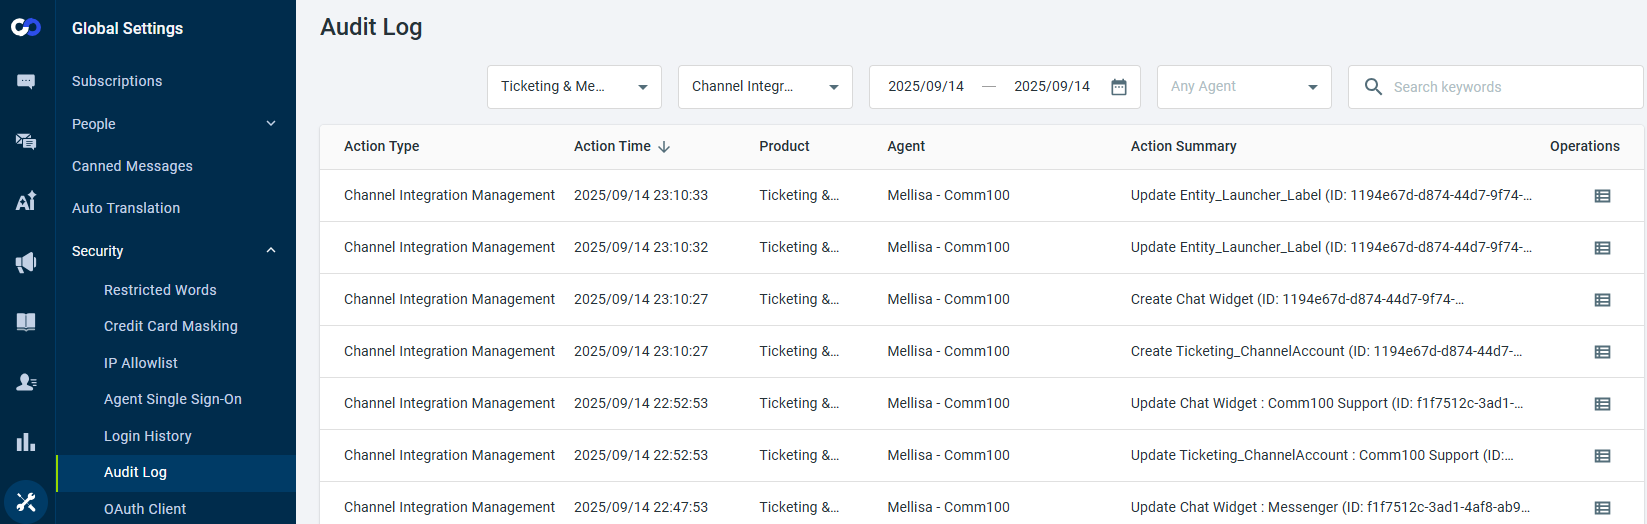
- Audit Log: To review the Anytime Chat configuration changes and track Audit Action Summary in Audit Logs, navigate to Global Settings > Security > Audit Log. Select Ticketing & Messaging Channel from the Product drop-down and select the Action type.
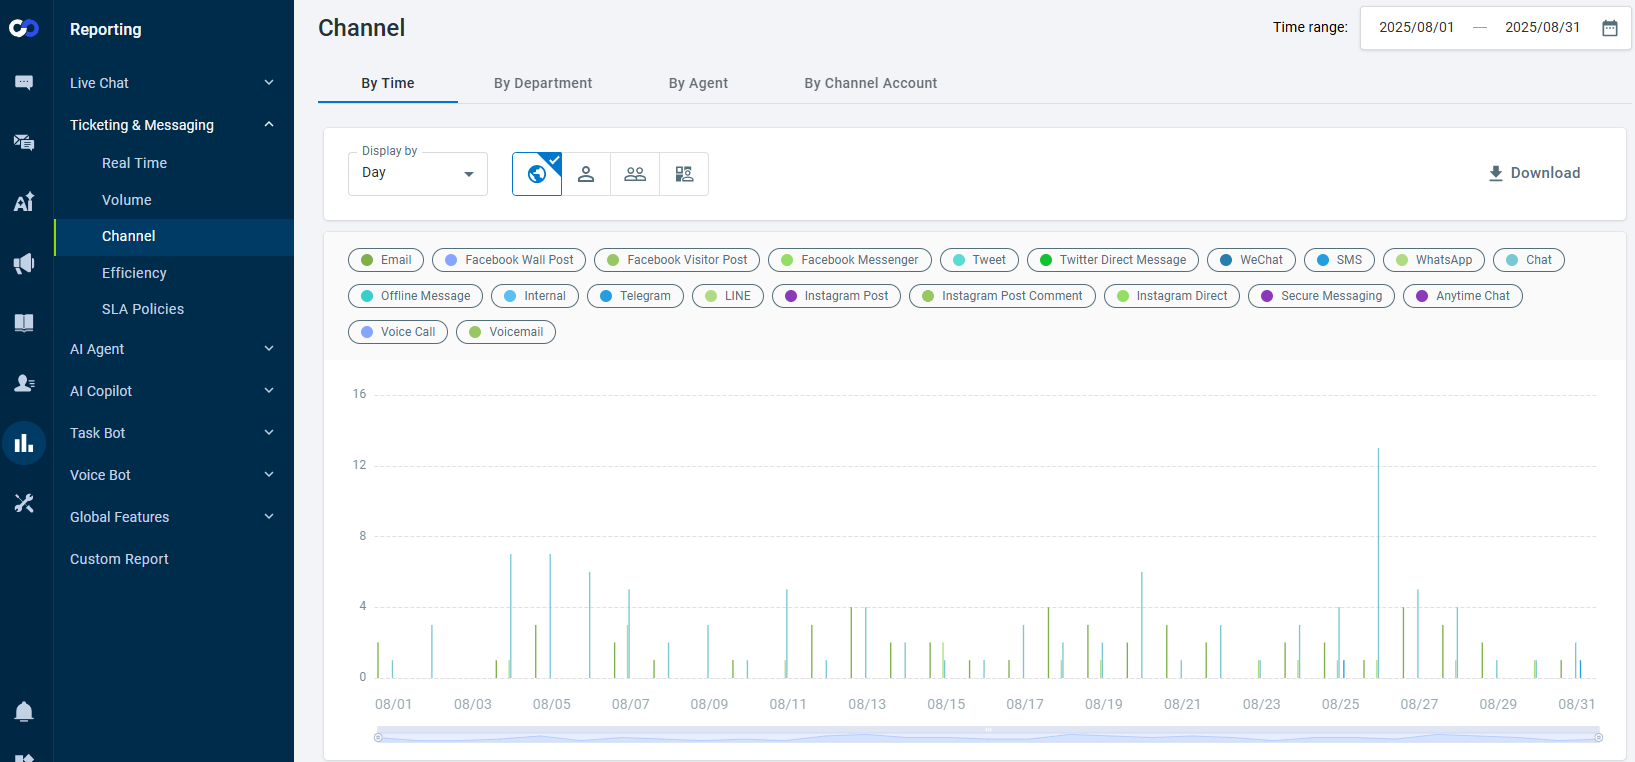
- Reports: To view the Ticketing & Messaging reports for the Anytime Chat channel, navigate to Reporting > Ticketing & Messaging > Channel. Apply the filters and view the reports.
To learn more about Ticketing & Messaging reports, see this article.


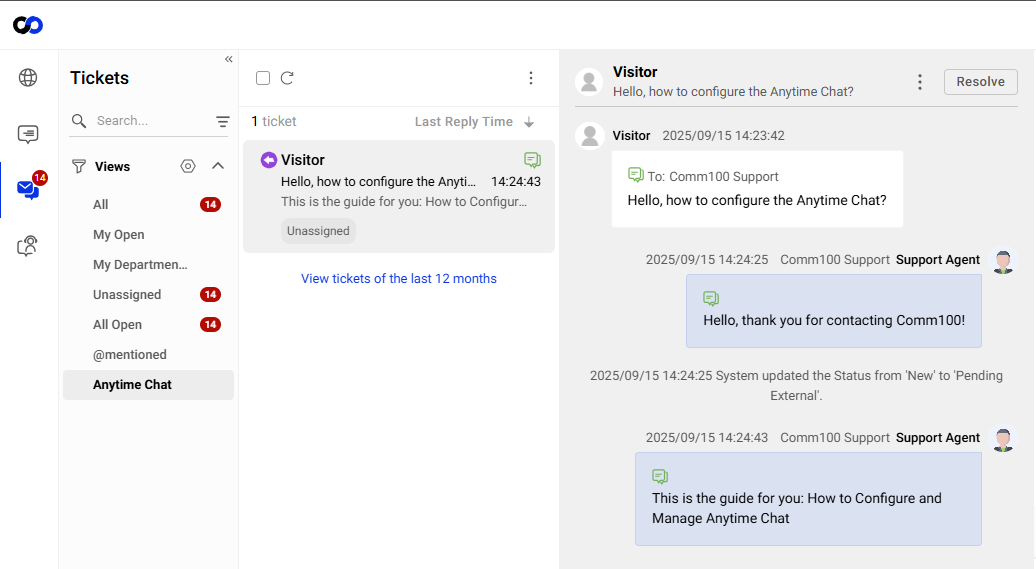
On the Agent Console, you can create Views and answer the Anytime Chat tickets that your visitors create. Once you have configured the Anytime Chat and installed the code on your website, agents can start answering Anytime Chat tickets from the Agent Console.
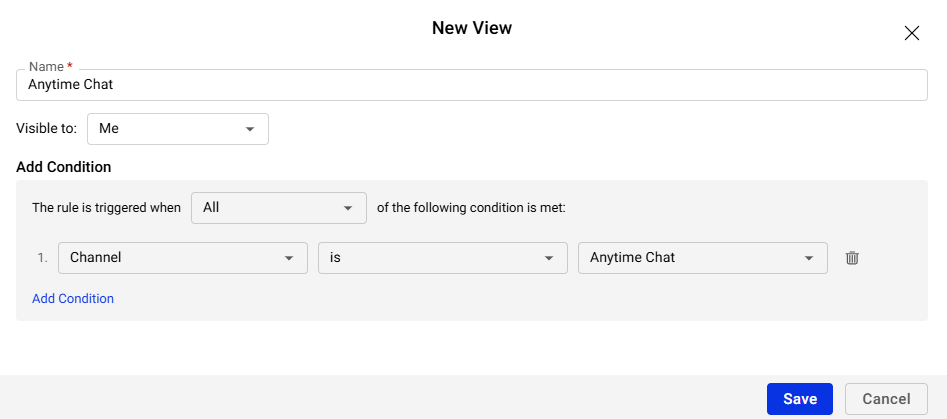
You can also create separate Views to manage your Anytime Chat channel tickets. You can use fields like Channel, Channel Account, Last Message Channel, Last Message Channel Account, and so forth to add conditions and create Views.
To learn more about Views in Ticketing & Messaging, see this article.
If you need help in configuring or managing your Anytime Chat, you can chat with us!