In Comm100 Queue Management, after locations and queues are set up on the Control Panel, agents can view and serve customers who have joined the queue. This article walks you through the operations that you can perform to manage the queued customers from the Agent Console.
If you are assigned to a queue which belongs to a location with multiple desks, you need to select a desk before you start serving customers. Your desk information is shown to customers to direct them when they are summoned.

- To learn how to create and set up the queue, see this article.
- Comm100 Queue Management is independent of Comm100 Live Chat, Comm100 Ticketing & Messaging, and Comm100 Bot. If you are also using Live Chat, Ticketing & Messaging, or Bot, be aware that your chat status (whether online, away, or any custom away status) has no impact on the queue system. You can serve queued visitors in any chat status.
Managing Customers from the Queue
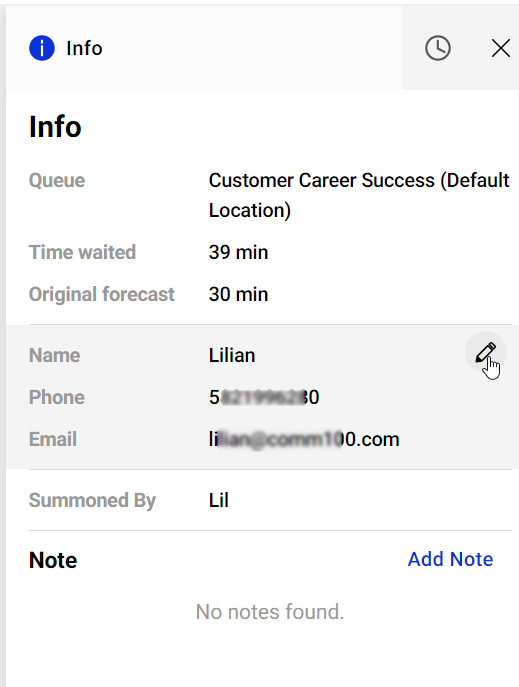
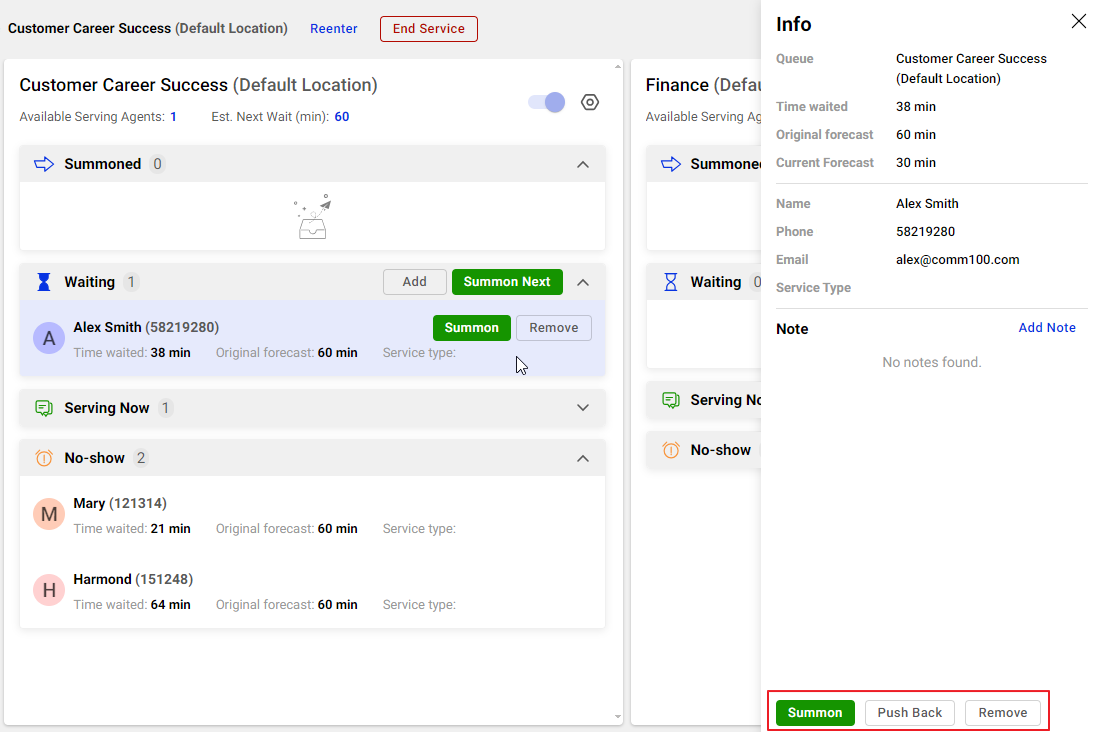
Depending on permissions and assigned queues, you can have access to multiple queues. For each queue, the Agent Console categorizes customers by their queue status. Click the customer in the list, you can view the following customer information.
- Customer details such as name and phone that are collected from the Join Queue page. You can also modify the information or add a note if necessary.
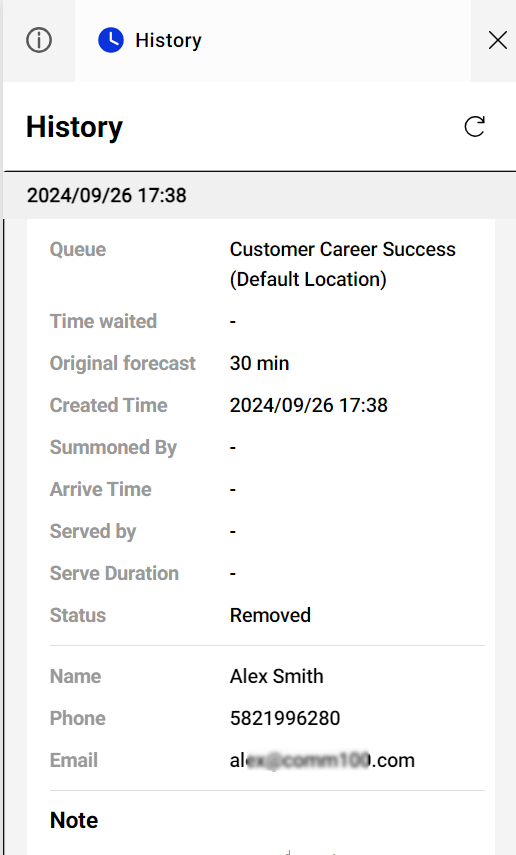
- The customer's previous queue sessions in the system. You can see the session details such as queue name, time waited, serve duration, and more from the History tab.
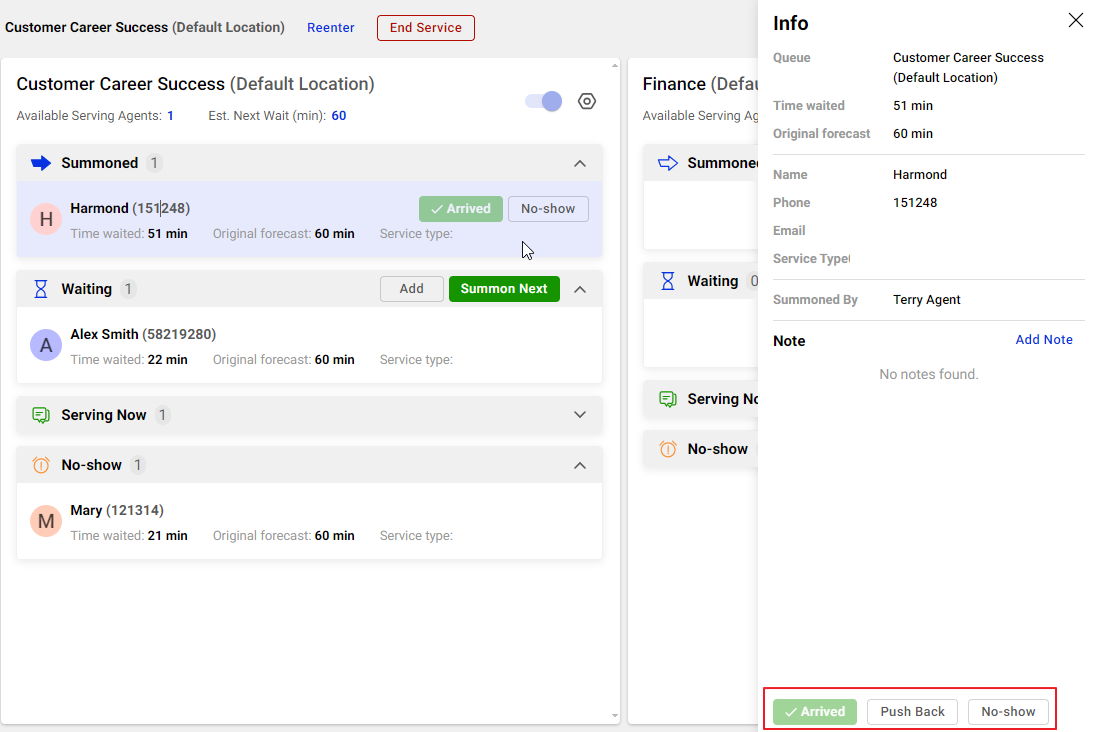
You can perform different operations for customers of different statuses.
- The Summoned category lists customers who have been summoned but have not been served. You can mark Summoned customers as Arrived or No-shows, or push them back to any position in the queue.
- When you click the Arrived button, the customer moves to the Serving Now category. If you are already serving a customer, the Arrived button is grayed out.
- If you do not click the Arrived button within a specified period, the customer moves to the No-show category automatically. The time is defined by Summon to no-show time through Queue > Queues > Resources on the Control Panel.
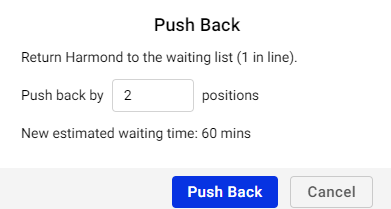
- When you push back a customer, you can define the new position for the customer and see the new estimated waiting time. Customers at the end of the queue cannot be pushed back.
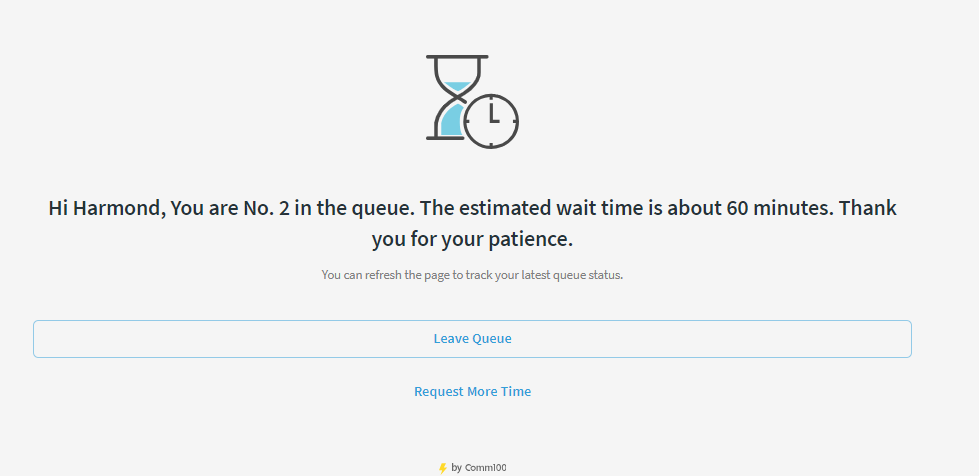
Customers in Summoned or Waiting status can also request more time in their queue page.
- The Waiting category lists customers who are waiting in the queue. You can summon or remove customers from the waiting list, or push them back to any position in the queue.
- You can manually add customers to the waiting list by providing information such as name and phone number.
- The list shows the customers from top to bottom by the time when they join the queue. You can click Summon Next to summon customers in sequence.
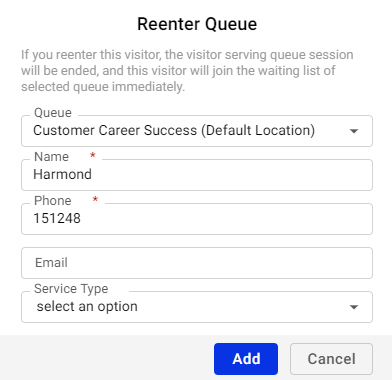
- Both the Serving Now category and the top banner show the customer that you are currently serving. You can put the customer back in the queue or to another queue by clicking Reenter in the top banner.
When reentering a customer, you can choose the new queue for the customer. Reentering ends the current serving session and puts the customer to the end of the new queue immediately. - The No-show category lists customers who have been summoned but did not show up. You can summon no-show customers, add them to the waiting list, or remove them.
- When you Rejoin no-show customers to the waiting list, they are listed by the time they entered the queue.
- A no-show customer is automatically removed from the list after a specified period. The time is defined by No-show to removed time through Queue > Queues > Resources on the Control Panel.


Manage Queue Settings
On the Agent Console, you can manage queue settings, including changing queue status and updating the number of available serving agents. If you are assigned to multiple queues, you can also hide unwanted queues to focus on the queues requiring attention.
Change Queue Status
By default, the system changes the queue status based on working hours and holidays. In this mode, the queue is open during working hours and automatically closed outside working hours or when the estimated wait time for the next customer passes the closing time. You can change the control mode to manual mode, and open or close the queue according to actual requirements.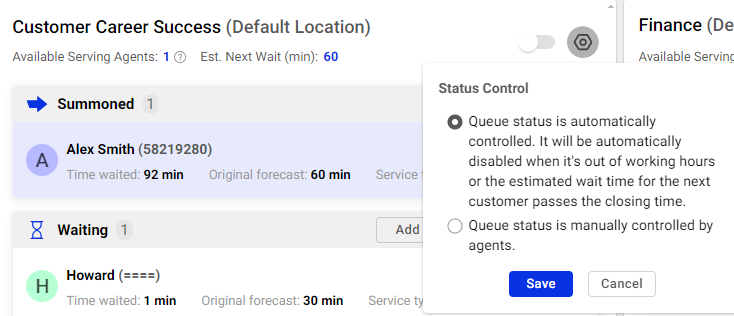
Update Available Serving Agents
The number of available serving agents is used to calculate the estimated wait time for customers. You can update the number of available serving agents in real-time to make the estimates more precise. When some team members are unavailable, updating the number accordingly saves customers from waiting in a long queue line.

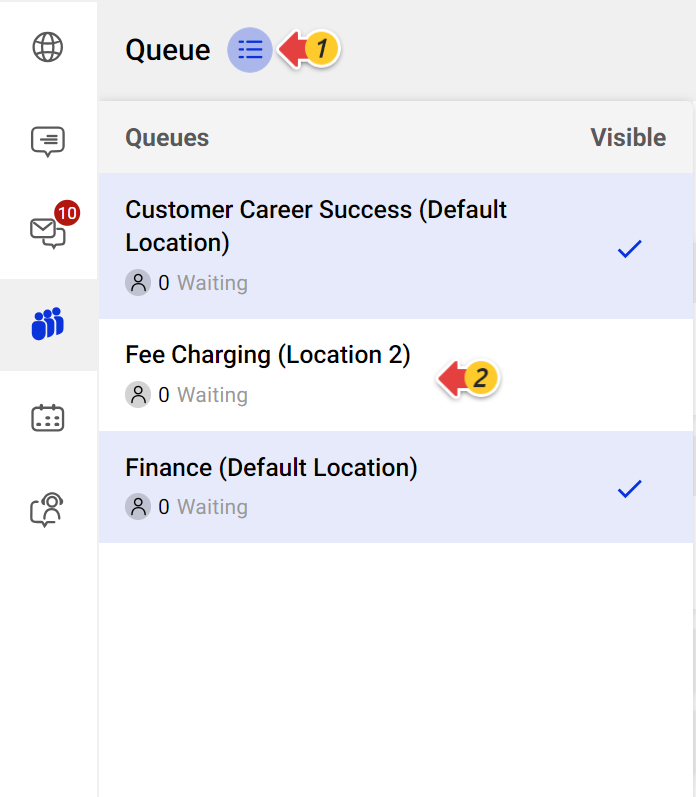
Hide Unwanted Queues
By default, all the queues that you are assigned to are displayed on your Agent Console. To hide unwanted queues, click the queue menu button, and click on the queues you want to hide.