The visitor Single Sign-On (SSO) feature allows you to authenticate your visitor’s account information before the conversation starts. It allows you to map your customer account information with Comm100 Contact fields and synchronize the information from your account system to Comm100 Messenger when the customer starts a conversation.
Once your visitors log in via Single Sign-On and start a conversation, your agents can view the mapped Contact Information in Agent Console while replying to those tickets. This helps them know who they are engaging with and avoid asking the same standard questions, speeding up the resolution and improving customer satisfaction.
How Visitor SSO works?
Comm100 Messenger Visitor SSO supports SAML (Security Assertion Mark-up Language) and JWT (JSON Web Token) for exchanging authentication and authorization data between your IdP (Identity Provider) and the Comm100 Messenger server.
When a customer clicks on the Messenger window's login option, the Comm100 Messenger server asks your IDP server whether the customer has been authenticated. If the customer has already logged in to SSO using the same browser, the IDP server returns the response to Comm100, and the customer is connected to Messenger immediately. Otherwise, the login page shows up in the conversation window, asking customers to log in.
The credentials provided on the page are sent directly to your SSO server, not Comm100, which means this authenticating process is done solely on the SSO service side, preventing man-in-the-middle hacks and other possible password breaches. Once authenticated, customer account information is sent to Comm100 Messenger.
Your agents can see the information right in the Agent Console, where you communicate with customers. You can also make SSO authentication optional. Customers who choose to communicate as a visitor skip the authentication step. In this case, your agents cannot view their account information in Comm100 Messenger.
Requirements for Setting up Visitor SSO
Before configuring Visitor SSO via SAML or JWT, you need to collect required information depending on the standard you use.
SAML Visitor SSO
Before configuring SAML Visitor SSO, you need to download the service provider metadata from Comm100 and share the file with your identity provider first. Your IDP provides the required configuration details accordingly. The configurations include the following:
- Sign On URL
- Artifact resolution service URL
- Log Out URL
- SAML Certificate
To ensure data security, Comm100 suggests adding a signature to the SAML Response returned from IDP to Comm100 SSO, which requires a certificate to verify signature validation.
JWT Visitor SSO
Before setting up JWT visitor SSO on Comm100, you need to generate the JWT and collect the following information:
- Remote login URL: The URL that visitors are redirected to for remote authentication in the Messenger window. If you set up IdP-initiated SSO login, the URL is optional.Note: IdP-initiated SSO login allows a visitor to log in to Comm100 directly without being redirected as long as the visitor has logged in to your system.
- Certificate: The public portion of the RSA key generated by your Identity Provider. We use the key to validate the JWT generated by you.
Enabling Visitor SSO in Your Comm100 account
After gathering the required information, follow these steps:
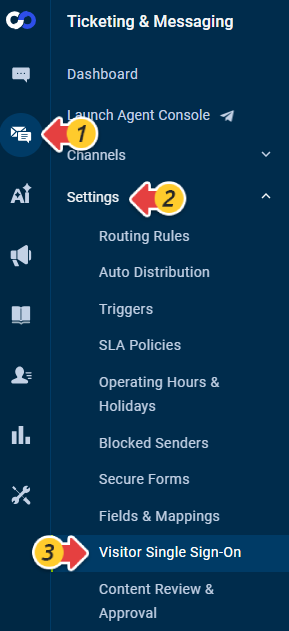
- Log in to your Comm100 account.
- From the left navigation menu, go to Ticketing & Messaging > Settings > Visitor Single Sign-On.
- Turn on the Visitor Single Sign-On(SSO) toggle key, and choose SAML SSO or JWT SSO according to your needs.
- In the SSO Settings section, add the information that you have gathered. Note:
- For SAML SSO, you need to download the Service Provider Metadata file and share it with your identity provider first.
- For JWT SSO, if you have set up IdP-initiated SSO login via JavaScript API, the Remote login URL can be empty.
- In the SSO Data Mapping section, add all user attributes that you want to collect. You can collect Contact information, like name, email, phone number, and so forth.
- From the Sign-In Options drop-down list, select a sign-in option. Two sign-in options are available to satisfy different business requirements:
- No sign-in: Your customers and visitors can start a conversation with you right after clicking on the Messenger launcher.
- Sign-in required: Your customers and visitors are required to log in before conversation. If a visitor does not have an account with you, they will not be able to access Messenger. This option helps you automatically keep out ineligible visitors if your Messenger is exclusive to customers with accounts.
- Click Save.