Comm100 chatbot supports Auto Translation based on Google Translation integration. Auto Translation enables your bot to chat with visitors using any language.
When Auto Translation is enabled, the chatbot detects the visitor’s language and translates the message automatically. The chatbot then sends responses in the language that the visitor used in the latest message. Visitors can see both the original and translated messages in the chat window.

- Auto Translation is a feature point for classic chatbots. The latest generation of AI Agent is multilingual and do not require manual enabling.
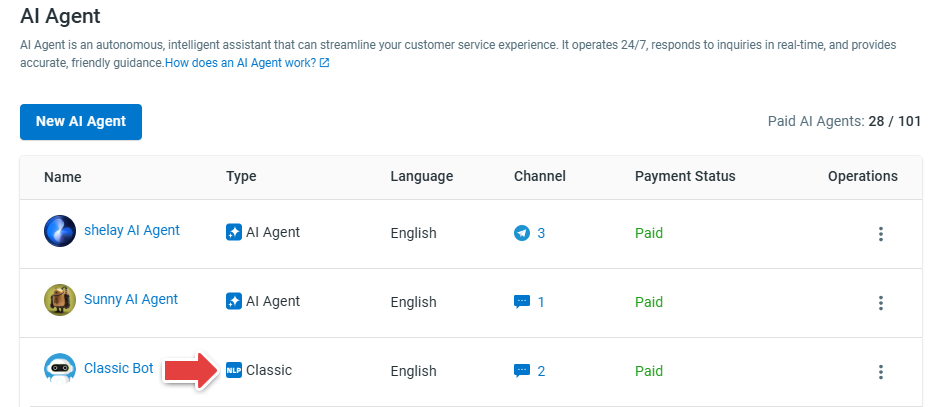
- The classic chatbot’s language is configured when you created it and cannot be edited thereafter. You can view the bot’s language on the Manage AI Agents page.
When Auto Translation is enabled, the chatbot translates all the incoming and outcoming messages with the following exceptions:
- The chatbot does not translate link URLs or linked web pages.
- When the chatbot sends a form, the inviting message including the form title will be translated into the visitor’s language, but all other texts in the opened form window, including the field name, field options, and button text, will not be translated.Note: The content in the opened form window is the same as your configuration when you configure the Send a form action for the chatbot. The form language can be different from the chatbot's language.
As shown in the following figures, form invitation content is translated, and all the content in the new form window uses the same language when you configured the form.
Figure 1. Chatbot sends invitation in the visitor's language

Figure 2. Opened form content is not translated

You can alslo configure a list for words or phrases that do not need translation so that they will be kept in both incoming and outcoming messages.
Step by Step Instructions
Auto Translation is disabled for chatbots by default. You can enable the feature based on your needs.
To enable Auto Translation for a chatbot, follow these steps:
- Log in to your Comm100 Control Panel.
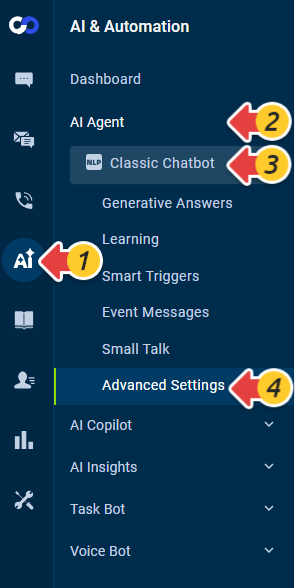
- From the left navigation menu, go to AI & Automation > AI Agent > Advanced Settings. If you have multiple AI Agents, make sure to choose the correct one from the drop-down list.
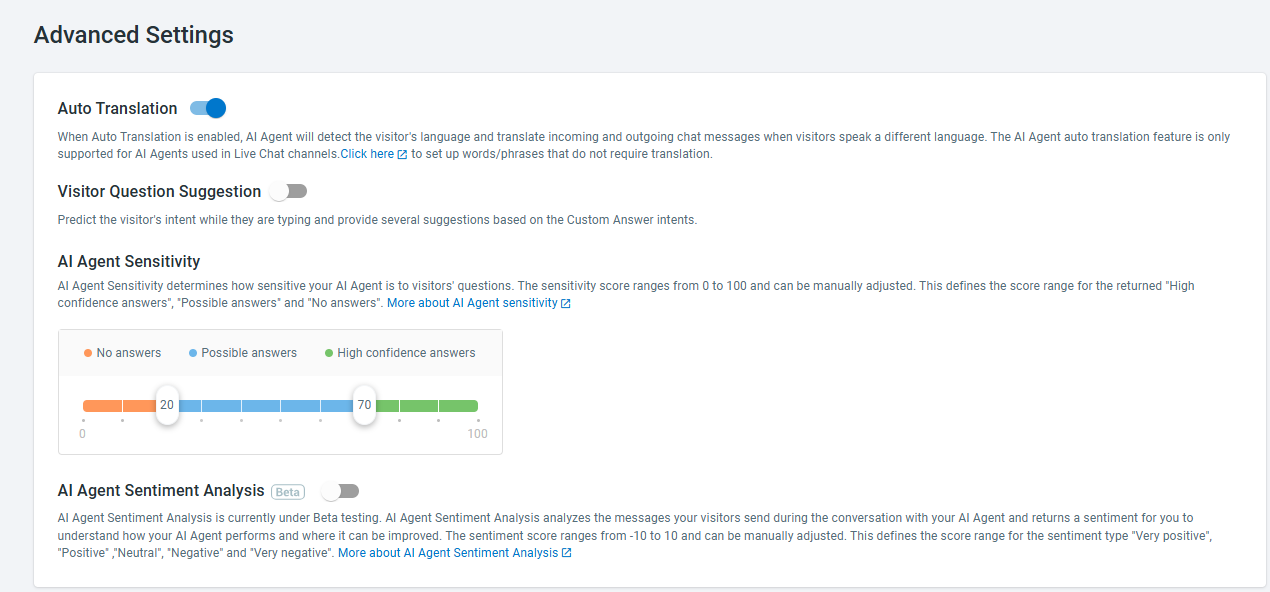
- Turn on the Auto Translation toggle key.
- (Optional) To configure the words and phrases that do not need translation, click the Click here link in the Auto Translation area, and add the words or phrases on the Auto Translation page.Note:
- To add or remove the words for Auto Translation in subsequent use, navigate to Global Settings > Auto Translation.
- The no-translation list configuration is global. If Auto Translation for Live Chat and/or Auto Translation for Ticketing & Messaging is enabled, the list also works for Live Chat and/or Ticketing & Messaging.