Contact management is essential to managing customer relationships effectively. To help businesses personalize interactions with their customers, Comm100 provides contact management to collect and organize contacts. With Comm100 contact management, you can collect and manage contacts from Live Chat, email, SMS, and social channels such as Facebook and Instagram. Contact fields are used to store customer's information such as name, email, and more. You can customize contact fields to organize customers using information specific to your business requirements. With organized contact information, you can send personalized messages to customers and automate sending messages to target customers.
This article introduces the operations to manage contacts and contact fields.
On the Comm100 Control Panel > Contact Management > Contacts, you can view a complete list of contacts saved in the system. The list shows contact information in Name, Email, and SMS columns, and you can click a specific contact to view more details. In the Comm100 Contact system, the contact’s identity fields (including visitor ID and their accounts from different channels, such as email, SMS, Facebook, Twitter, WhatsApp, Telegram, WeChat, Line, and Secure Messaging) are used as the unique identifier. Different contacts can have the same name, but cannot have same identity fields, for example, the same email address.

On the contact page, you can:
- Filter the contact list to show the contacts of interest.
- Create a new contact by providing the name and identity information.
- Import a contact file to integrate your contacts from other platforms with the Comm100 system.
- Export the contact data for a backup. You can apply a filter first and then export the contacts you want.
- Delete contacts. After a contact is deleted, you cannot follow up on the tickets or outreach campaigns related to the contact. The history messages related to the contacts will not be deleted.
Filter the Contact List
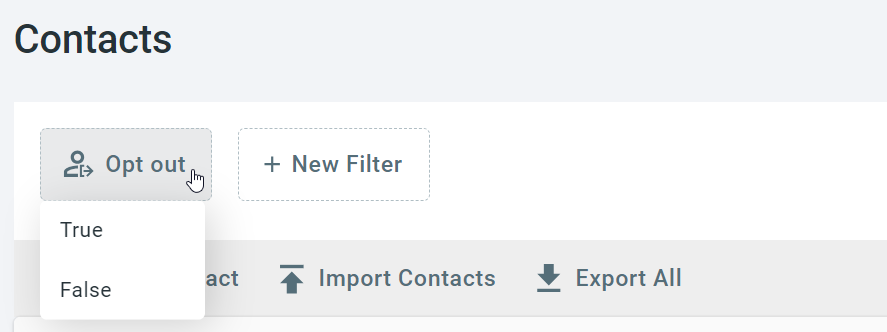
You can filter the contact list by using the Opt out filters or creating your own conditions.
- Message opt-out allows your contacts to choose to stop receiving further communications from you to avoid unwanted messages. If you have used SMS opt-out in Outreach management, you can filter out opt-out contacts quickly by clicking Opt out > True. To learn more about Opt-out management, see this article.
- Apply filters by using one or more contact fields.
Create a Contact
To create a contact, follow these steps:
- On the Contacts page, click New Contact on the top toolbar.
- Enter the contact’s information.
- Contact name is required. Different contacts can have the same name.
- The contact’s account in different channels (such as email, SMS, Facebook, Twitter, WhatsApp, Telegram, WeChat, Line, and Secure Messaging) are identity fields. When adding a contact, one of the identity fields is required.
- You cannot create two contacts with the same identity information, for example, the same email address.
- Click Save.
The contact appears in the list after your changes are saved successfully.
Import Contacts
If you have an existing file containing contact information, you can import the file to add the contacts to Comm100.
- As the import process may update your existing data, and the import action cannot be undone once the processing completes, you can export existing contacts for a backup before starting the process.
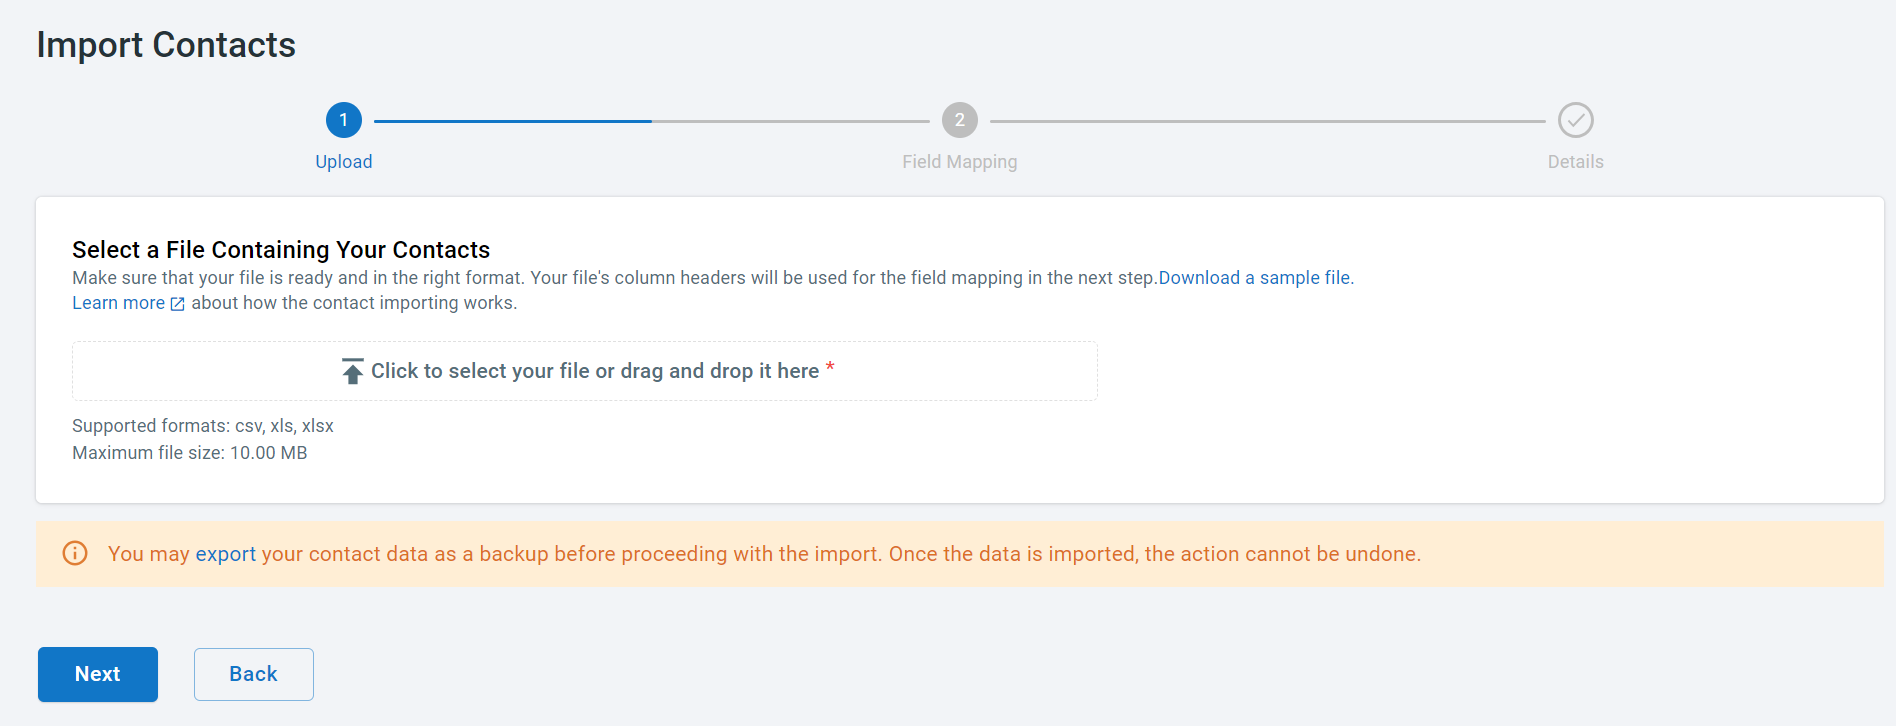
- Make sure your file is ready and in the right format before you start. Supported file formats: CSV, XLS, and XLSX. Maximum file size: 10MB. To learn more about how contact importing works, see this article.
To import contacts from a file, follow these steps:
- On the Contacts page, click Import Contacts on the top toolbar. The Import Contacts page shows a guided flow to import a file.
- On the Import Contacts page, download the sample file and edit your file according to the format. The column headers in your file are used for field mapping.
- Upload your file, and click Next to proceed to field mapping.
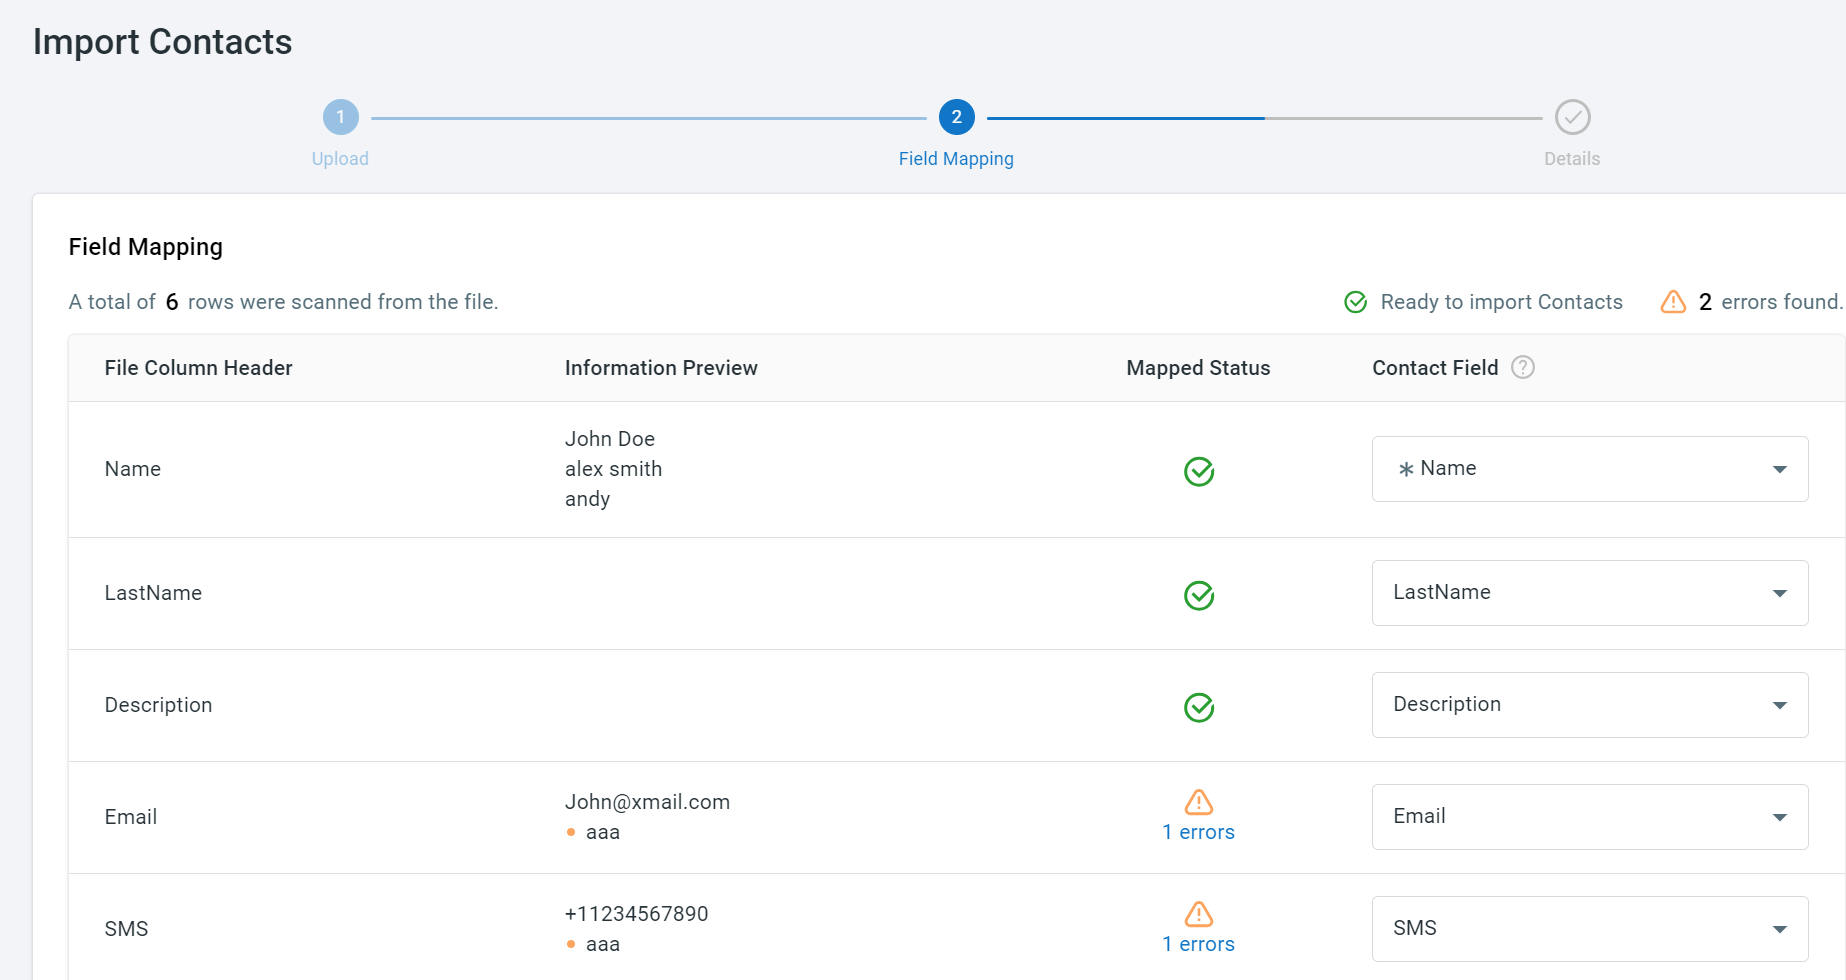
- The Field Mapping screen shows the scanning results with a preview of the first three rows of data from your file. You can check the scanning results and fix mapping errors.Note:
- The required contact fields are marked with an asterisk. A mapping error occurs when the system finds no match for a required field. By default, contact name and one of the identity fields are required for creating a contact.
- The number of mapping errors for each column shows in the Mapped Status column. You can click x errors to view details and fix the errors.
- You can proceed to import the correct data without fixing the mapping errors. The error data will fail in the import, and you can check the failure details and make updates accordingly after the current import succeeds.
- Choose the way to process duplicate contacts. A contact is deemed duplicate if one of the identity fields is the same as an existing contact. For example, if the email address of an imported contact is the same as an existing contact, the two contacts are deemed duplicate.
- Merge: The empty fields of existing contacts are updated. The existing fields remain unchanged.
- Skip: The existing contact information remains unchanged.
- Replace: The imported contact information completely overwrites the existing data.
- Click Import.
The page shows the import results including after the import is completed. You can download the file to check details.
Export Contacts
You can download the contact data to the local file system for a backup or for future reuse.
To export contacts, follow these steps:
- Log in to the Comm100 Control Panel.
- From the left navigation menu, go to Contact Management > Contacts.
- Choose the following methods to export contacts:
- To export all contacts, click Export All on the top toolbar.
- To export part of the contacts, select the contacts first, then click Export Selected.
The contact data is saved in an XLSX file on your local file system.
Contact information is stored in contact fields. Comm100 contact fields include system fields and custom fields.
In the fields list, fields are marked with different letters.
- Letter S represents a system field. System fields cannot be deleted. Only part of the field information can be edited.
- Letter C represents a custom field. You can create, edit, or delete custom fields to track your contact information better.
- Letter I represents an identity field. All identity fields are system fields. At least one of the identity fields is required when creating a contact.
To create a custom contact field, follow these steps:
- Log in to the Comm100 Control Panel.
- From the left navigation menu, go to Contact Management > Fields.
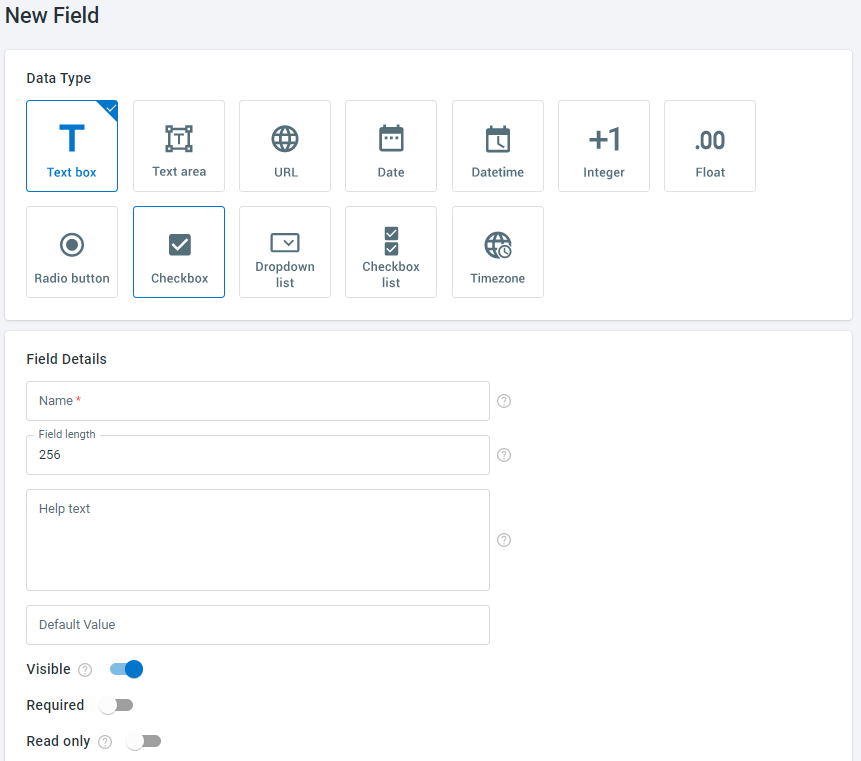
The Fields list shows pre-built fields. - Click New Field, and enter the following field information.
- Select data type.
- Provide field name, length, help text, and default value.
- (Optional) Turn on the toggle keys: Visible, Required, and Read only. The meaning of field settings are as follows:
- Visible: Visible fields appear when creating contacts. If you do not need a prebuilt field, turn off the Visible toggle to hide it.
- Required: Required fields indicate the information is required when creating a contact.
- Read only: Read-only fields indicate the information cannot be changed after a contact is created.
- Click Save.
The field appears in the list after your changes are saved successfully.


