You can use our in-house Bot engine or your Third-party Bot to create a Comm100 chatbot. This article walks you through the steps to create a chatbot using Comm100 in-house engine. When creating a Chatbot, you need to define the basic settings including Chatbot name, Channel, and language. After your Chatbot is created, you need to configure advanced settings such as Chatbot sensitivity to personalize your Bot.
Note:
- The Chatbot can be deployed in one channel only. The Chatbot that was bound with multiple channels previously will continue to work in the same way.
- Comm100 provides AI Agent with enhanced intelligence and adaptability in the place of classic chatbots. You can upgrade your plan to explore advanced AI capabilities. Please contact your account manager for details. Our team is here to ensure a seamless and efficient transition.
- To learn more about how to use a third-party Chatbot, see How to Use a Third-Party Chatbot, How to Integrate Watson Assistant with Comm100.
- After creating a Chatbot, you need to set up the Bot for the Channel it is applied to. To learn more about setting up the Chatbot in Live Chat and Ticketing & Messaging, see this article.
To create a Comm100 Chatbot, follow these steps:
- Log in to your Comm100 Control Panel.
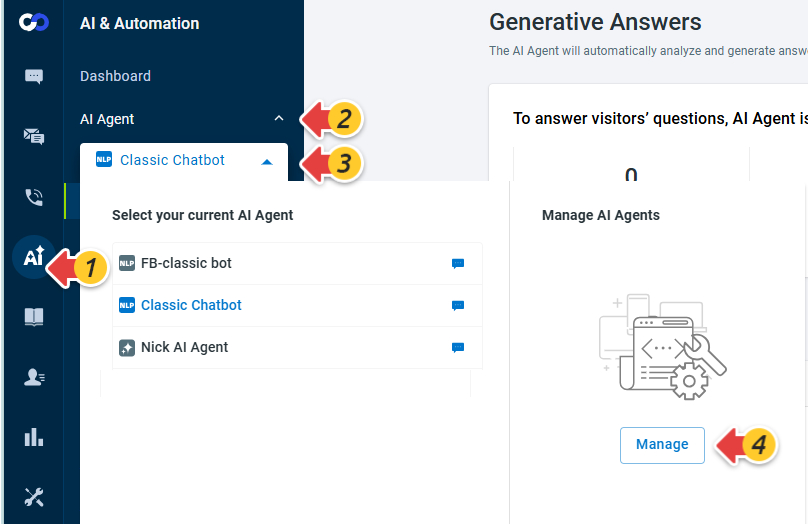
- In the left navigation menu, go to AI & Automation > AI Agent.
- Expand the drop-down list and click Manage in the Manage AI Agents area.
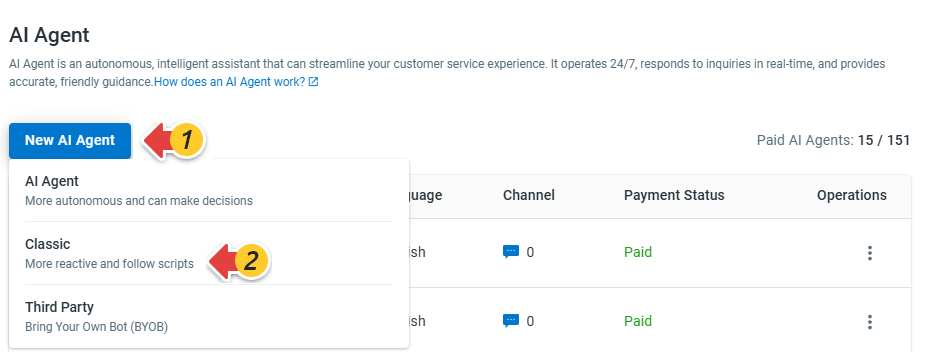
The AI Agent drawer appears from the right. - On the AI Agent drawer, click New AI Agent, and choose Classic.
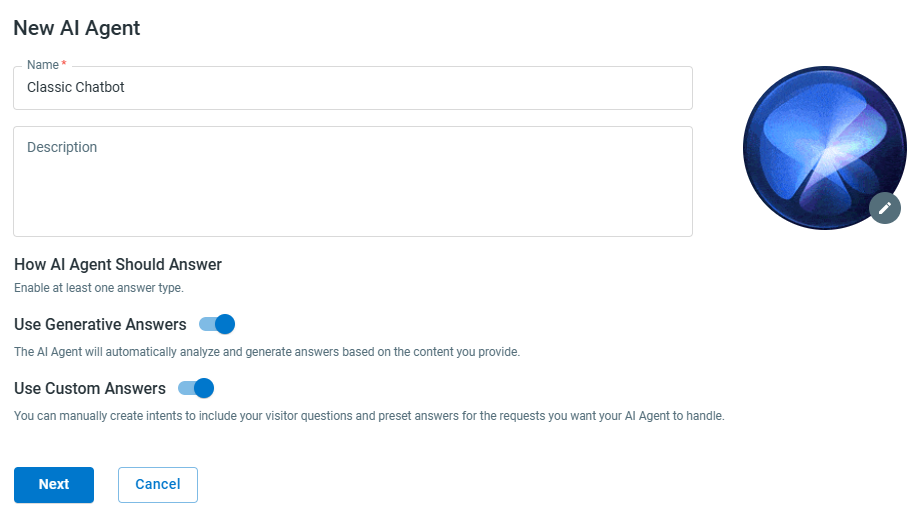
- On the New AI Agent drawer, input the Chatbot name, choose how the chatbot provides an answer and click Next.
- Use Generative Answers: When a question is asked, the Chatbot generates an answer through deep learning and analysis of the extensive information sources you provide.
- Use Custom Answers: When a question is asked, the Chatbot provides the predefined response by finding a match from its Intent library. You need to set up the Intent library for the Chatbot.
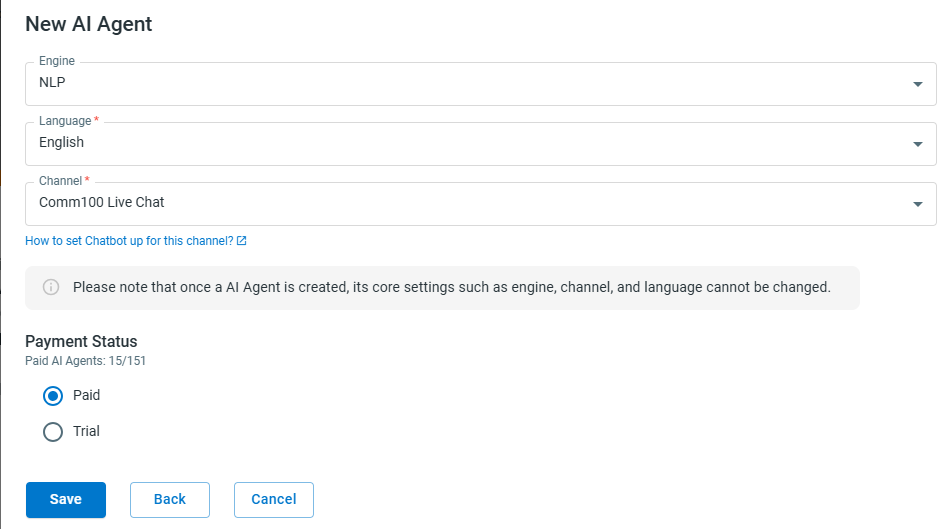
- Select the Engine, Language, and Channel from the drop-down list, and choose the payment status. The Chatbot's engine, language, and Channel cannot be changed once it's created.
- Click Save. Your Chatbot is created successfully.
Note:
- When Generative Answers and Custom Answers are both enabled, the Chatbot uses Custom Answers as a first choice to answer visitors’ questions, and it only provides generative answers when it cannot provide a High confidence answer using custom answers. To learn more about how the Chatbot provides an answer, see this article.
- The number of paid Chatbot is subjected to your subscription. You can create trial bots when paid Chatbots are used up. Contact sales@comm100.com if you wish to create more paid Chatbots.
After creating a Chatbot, you can edit or delete it as needed. You can also export and import the Chatbot along with its configured settings, Intents, Entities, and Quick Replies. To learn more about Chatbot import and export, see this article.